Skip to content
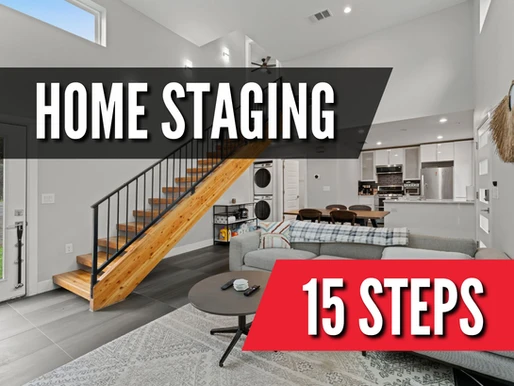
Real estate photography can make your listing stand out and even increase its perceived value. In this guide, you’ll discover easy, pro‑level tips from staging and lighting hacks to framing tricks to make every shot of your home shine. Ready to turn your space into a buyer’s dream? Let’s dive in and get those picture‑perfect results!

Table of Contents
Setting the Scene for Enchanting Twilight Photos Video Content: Walkthroughs and Video Production Clean and Polish: Make Every Surface Shine


Managing Seasonal Decor
Imagine scrolling through a listing in July, only to be greeted by a room overflowing with twinkling Christmas lights. Now picture the same space with just a single wreath or a tasteful bowl of autumn apples timeless, inviting, and never out of place. In your real estate interior photos, subtlety wins every time.
Quick mental exercise: Pretend you’re a buyer browsing in March. Does that garland still feel fresh? Swap it for a simple vase of tulips. Fast‑forward to November—would those flowers look odd? Replace them with a rustic pumpkin or a sprig of fall leaves.
By keeping seasonal accents to a minimum think one wreath, a small fruit display, or a delicate floral arrangement you signal “seasonal charm” without clutter. This ensures your home’s beauty shines through any time of year and keeps prospective buyers focused on the space, not the décor.

Setting the Scene for Enchanting Twilight Photos
-
Lighting Up: Ensure every interior and exterior light is working and turned on—landscape uplights, porch sconces, and decorative fixtures—to create that warm, inviting glow ideal for real estate photography.
-
Clean Windows and Glass: Wipe away all smudges and streaks so your twilight real estate photography captures crystal‑clear reflections and the full beauty of evening hues.
-
Stage Outdoor Areas: Arrange lounge chairs with plush cushions or set a softly lit bistro table. If you have a pool, make sure it’s clean, well‑lit, and consider adding gentle water features to highlight your home’s ambiance.

Video Content: Walkthroughs and Video Production
Bringing your “for sale” listing to life means more than static images—it’s about seamless property video walkthroughs that complement your real estate photography. Follow these steps to ensure your video production captures every detail and keeps buyers glued to the screen:
-
Deep Clean & Declutter
-
Go beyond a surface sweep: dust baseboards, vents, and light fixtures.
-
Stow away personal items (medications, paperwork, family photos) so the focus stays on the home’s features.
-
Remember: a spotless backdrop boosts both your video walkthrough and real estate photography by showcasing spaces at their very best.
-
-
Optimize Lighting & Color Consistency
-
Swap out mismatched bulbs for daylight‑balanced LEDs (5,500–6,500 K) to avoid weird color casts on camera.
-
Use portable LED panels or softboxes to fill dark corners—no more shadowy hallways or under‑lit kitchens.
-
Test your setup on a phone and a pro camera to confirm that your real estate photography and video capture identical, flattering tones.
-
-
Plan Your Path & Shot List
-
Storyboard your route: lead viewers from the welcoming foyer, through the great room, to the show‑stopping master suite.
-
Note key “moments” (e.g., designer fireplace, built‑in wine rack) and build in slow reveals or smooth gimbal pans for maximum impact.
-
-
Stabilize & Smooth Your Movements
-
Invest in a lightweight gimbal or steadicam for buttery‑smooth pans and tracking shots—shaky footage kills engagement.
-
Practice each move: start slow, accelerate through larger spaces, then ease up on the brakes as you reveal focal features.
-
-
Final Staging Touches & Living Accents
-
Bring in fresh flowers, a catch‑all tray by the front door, or artfully folded throws—tiny pops of life read beautifully on video.
-
Open drapes fully and flip on all lights just before rolling to bathe spaces in warmth, improving both your video and accompanying real estate photography.
-
By combining these production‑ready steps with your existing real estate photography, you’ll create walkthroughs that not only inform—but emotionally engage—potential buyers and drive them to schedule a showing.

Clean and Polish: Make Every Surface Shine
Attention to detail can significantly influence a buyer’s perception. Ensure every part of your home, including windows, countertops, and floors, is sparkling clean. This level of detail in your “professional real estate photos” reflects the care and maintenance you’ve put into your home, making it more attractive to potential buyers.
Manage Pet Areas and Hide Pet Belongings
Pets are lovely, but not when selling your home. Ensure pet areas are clean and all pet belongings are out of sight to maintain the aesthetics of your space. Make arrangements for pets to be out of the house or securely contained in an area that won’t be filmed. This prevents distractions and ensures the videographer can work without interruptions.

Preparing for Drone Photography
Ensure your exterior looks as good as your interior. With drone technology, “real estate twilight photos” taken from above can show off your landscaping and the layout of your property. Before the photographer arrives, remove clutter such as garden tools, bikes, and toys from the yard to ensure a clear, attractive presentation from every angle.
Before The Photographer Arrives: Homeowner Checklist
-
Light It Up: Turn on all lights to brighten every room.
-
Fans Off: Ensure all ceiling fans are turned off.
-
Clean Floors: Vacuum carpets and sweep all other flooring.
-
Mirror Shine: Clean all mirrors to a streak-free shine.
-
Toilet Seats Down: Close all toilet seats for a tidy look.
-
Consistent Lighting: Replace any mismatched lightbulbs to ensure consistent lighting throughout the house.
-
Lawn Care: Mow the lawn to enhance outdoor appeal.
-
Clear the Drive: Remove cars from the driveway to unclutter the view.
-
Trash Out of Sight: Hide trash cans to keep the focus on your home’s features.
-
Final Touches: Do a final walkthrough to check for anything out of place.

Closing Thoughts
Upgrading your home presentation with professional photography and videography is more than a luxury—it’s a necessity in today’s market. From stunning “real estate twilight photos” to comprehensive “real estate video production,” these tools can significantly enhance your property’s appeal and help it stand out in a competitive market. Ready to take your listing to the next level? Consider investing in professional services to ensure every shot captures the beauty and essence of your home. Our experts at Nitro Media are equipped to highlight the best features of your property, ensuring top-quality results that attract potential buyers. Don’t hesitate to contact us to elevate your home’s presentation in the real estate market.