Skip to content
You might wonder how you can handle event video coverage when you are just starting out. Many new videographers feel nervous, but you can avoid common mistakes with the right preparation. Here are some issues beginners often face:
-
Camera too close to the subject, causing awkward framing.
-
Relying only on autofocus, which can miss sharp focus.
-
Color and brightness that do not match between shots.
-
Shaky footage from holding the camera by hand.
-
Poor sound from built-in mics or not checking audio.
With the right approach, you can deliver a professional video that makes your clients happy.
Key Takeaways
-
Plan your event video by knowing why you are filming. Think about who will watch it. Decide what important moments you need to film.
-
Use the right gear like steady cameras. Use good microphones and proper lighting. This helps your video and sound stay clear.
-
Talk well with clients before the event. Keep talking during and after the event. This helps you meet their needs and build trust.
-
Film many types of shots. Get the main action, crowd reactions, and behind-the-scenes. This helps you tell a full story.
-
Organize and back up your footage carefully. Edit your video with clear storytelling. Add music and titles to make your video look finished.
Event Video Coverage Basics
What Is Event Video Coverage
When you start event videography, you help tell the story of an event. You use your camera and audio gear to record important moments and people. You also capture the feeling of the event. You plan your shots and think about what story you want to show. You make sure your video looks and sounds good. Later, you edit your footage. You add music, transitions, and fix colors to make the video look nice. This helps turn one event into useful content for marketing and promotions. You do more than just record. You help your clients share their message and keep memories safe.
Tip: Always talk with your client before the event. Ask about their goals and the moments they want to see. Find out how they will use the event video. This helps you make a video that matches what they want.
Types of Event Video
There are many styles in event videography. Each style has a different purpose and audience. Here are the main types:
| Main Category | Description | Sub-Styles / Examples |
|---|---|---|
| Corporate | Shows business events like conferences and product launches. Used for marketing or company records. | Promotional videos, Informational videos, Testimonial videos |
| Music | Records concerts and festivals. Shows the energy and excitement. | Concert videos, Festival videos, Documentary-style videos |
| Sports | Focuses on live sports. Captures action and big plays. | Game highlights, Player profiles, Team highlights |
You can also make an event highlight video. It shows the best moments in a short, fun way. This is great for social media and marketing.
Why Event Videos Matter
Event video coverage is a strong tool for marketing and getting people interested. When you share event videos, you help brands reach more people. Videos get three times more likes and comments than photos on social media. You can use event videos as teasers, highlight reels, or behind-the-scenes clips. These help build excitement and trust for future events. You can also use your videos on different platforms like TikTok, Instagram Reels, or YouTube Shorts. Event videography lets you show real people and real stories. This makes your brand feel friendly and easy to relate to.
Note: Adding captions and subtitles to your event video helps more people watch and enjoy your content.
Planning for Event Videography
Defining Purpose and Audience
You should know why you are making the video and who will watch it before you start. This step helps you make better choices as an event videographer. When you figure out the purpose and audience, you are more likely to do well.
Here are some easy tips to help you begin:
-
Pick one main goal. You might want to show off a product, save memories, or make a highlight video for social media.
-
Check your client’s old events. Who comes to these events? What do they like? This helps you learn about the audience.
-
Picture your perfect viewer. Think about their age, job, hobbies, and what they want from the event.
-
Make your video style fit the audience. A business event needs a different feel than a music festival.
-
Plan your video with a clear idea and script. Use a storyboard to plan out the story you want to show.
-
Think about where the video will be posted. Will it be on Instagram, YouTube, or a company website? This changes how long and what shape the video should be.
Tip: When you know your audience, you can make videos that talk to them and help your client reach their goals.
Creating a Shooting Plan
A good shooting plan helps you do well in event videography. Planning ahead helps you catch all the important moments and keeps you on track. Here is how you can make a plan that works:
-
Write down your goals. Decide if you need a recap, a promo, or a teaching video.
-
Go to the event place before the big day. Look at the lights, sound, and best spots for your camera.
-
Make a list of shots. Write down every important moment you need to film, like speeches, shows, or people reacting.
-
Learn the event schedule. Get a timeline from your client so you do not miss anything important.
-
Pick the right gear. Bring cameras, microphones, and lights that work for the event. For big events, you may need more than one camera.
-
Be ready to change your plan. Sometimes things happen fast. Be ready to film things you did not expect.
-
Film extra shots. Get video of decorations, signs, and people talking. These shots help tell the whole story.
Callout: A shot list and schedule help you stay organized. They make sure you give your client everything they want.
Communicating with Clients
Talking clearly is very important in event videography. You need to know what your client wants and make sure you meet their needs. Here are some ways to keep everyone working together:
| Strategy | Description | Key Benefits | Optimization Tips |
|---|---|---|---|
| One place for event info, contracts, and files. | Easy to use, clear, helps clients stay involved. | Update often, use your logo, remind clients to check it. | |
| Automated Messages | Send reminders and updates by email or text. | Saves time, keeps clients in the loop, looks professional. | Set up auto replies, reminders, and follow-ups. |
| Simple Booking Forms | Get client needs and likes at the start. | Fast booking, clear info, less mix-ups. | Ask good questions, keep forms short, update when needed. |
| Shared Event Timelines | Give clients a full schedule to look at. | Builds trust, helps everyone get ready, no surprises. | Work together on the schedule, update if things change, share in the portal. |
| Feedback Tools | Ask for feedback after the event. | Makes your service better, shows you care, builds your name. | Use short surveys, say thank you, show how you use their ideas. |
Always ask questions and listen well. Find out which moments are most important to your client. Be honest about what you can do. Tell them how you work, your timeline, and what you need from them. Keep talking before, during, and after the event. This helps you build trust and good relationships for the future.
Note: Good communication helps you avoid problems and makes your job as an event videographer easier.
Preparing Equipment and Yourself
Essential Camera Gear
When you start event videography, choosing the right equipment makes a big difference. You want tools that help you capture high-quality footage without making things too complicated. Here are some basics you should have:
-
DSLR or mirrorless cameras, like the Sony A7SIII or Canon EOS R5, give you great video quality and are easy to use.
-
Action cameras, such as the GoPro HERO10 Black, work well for fast action or unique angles.
-
Drones, like the DJI Mavic 3, let you get cool aerial shots.
-
External microphones (handheld, lavalier, or shotgun) are a must for clear sound.
-
Tripods and gimbals help keep your shots steady.
-
LED panels and reflectors improve your lighting.
You can start with a smartphone, but moving up to a dedicated camera helps you deliver a high-quality video that stands out.
Audio and Lighting Basics
Good sound and lighting turn an average video into something special. For audio, use a directional on-camera microphone, such as the Rode VideoMic Pro+, to pick up voices even in noisy places. Wireless lavalier mics work well for interviews or speeches. For lighting, portable LED panels like the Aputure AL-MX help fill in shadows and make your subjects look their best. Soft light, created by bouncing or diffusing, gives a natural look. Try a simple two- or three-point lighting setup: use a key light, a fill light, and a backlight to add depth.
Tip: Place your lights a little above eye level and keep your subject away from the background to avoid harsh shadows.
Backup and Accessories
You never want to lose your footage. Professional videographers use smart backup strategies to keep data safe. Cameras with dual card slots let you record to two memory cards at once. Use a card case to organize your cards. After the event, back up your files to at least two places, like an external drive and the cloud. The 3-2-1 backup rule means you keep three copies of your data, on two types of storage, with one copy off-site. This keeps your work safe from accidents.
| Backup Strategy | What It Means |
|---|---|
| Dual Card Slots | Record to two cards at once for instant backup. |
| Organized Card Storage | Use a card case to keep track of memory cards. |
| 3-2-1 Backup Rule | Three copies, two types of storage, one off-site for extra safety. |
Self-Care Tips
Long events can be tough. You need to take care of yourself to do your best work. Schedule breaks to rest and recharge. Use time management tricks, like the Pomodoro Technique, to stay focused. Set clear work hours and let clients know when you are available. Spend time with family or friends to relax. Connect with other videographers for support and advice. When you feel good, you can focus better and create amazing videos.
Remember: Taking care of yourself is just as important as choosing the right equipment.
Event Video Production Workflow
Arriving and Setting Up
You want to start your event video production strong. Arriving early gives you time to get ready and fix any problems before guests arrive. Here’s a step-by-step way to set up like a pro:
-
Meet with the event staff or organizers. Ask about the event flow, audience size, and any special audio-visual needs.
-
Walk around the venue. Check the room size, layout, lighting, and sound. Look for power outlets and places to set up your gear.
-
Decide what equipment you need. Think about cameras, microphones, lights, and backup items like extra cables and batteries.
-
Use a checklist. Write down all your gear, contact info, and a setup plan. This helps you remember everything.
-
Set up your equipment. Place cameras where you can see the stage and the crowd. Test your microphones and lights.
-
Run a quick rehearsal. Play with your camera angles, check your sound, and make sure your backup gear works.
-
Stay in touch with your team. Use walkie-talkies or phones to talk to each other during the event.
Tip: Early setup lets you adjust your plan if something changes. You can also spot cool places for creative shots.
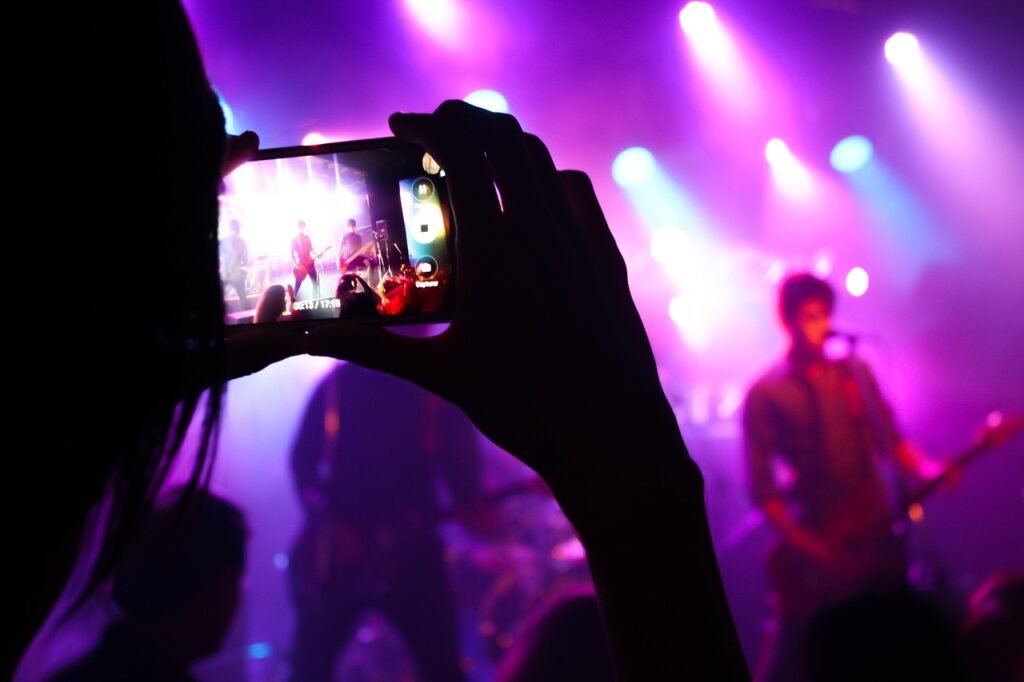
Capturing Key Moments
You want your event video to tell the whole story. That means capturing significant events as they happen. Here are some event videography techniques to help you catch every important moment:
-
Watch people closely. Look for smiles, hugs, and reactions. These real moments make your video feel alive.
-
Use a longer lens to film from far away. This helps you get natural shots without making people feel nervous.
-
Talk to guests and staff. When people feel comfortable, they act more natural on camera.
-
Bring cameras that work well in low light. Use lenses that let in lots of light for indoor or dark settings.
-
Always have extra batteries and memory cards. You don’t want to miss anything because your gear ran out of power or space.
-
Use different cameras for different angles. Try wide shots to show the whole room and close-ups for faces and details.
-
Make a shot list and follow the event schedule. This helps you plan for speeches, awards, or big surprises.
-
Stay organized. Label your files and keep your gear tidy.
Callout: Don’t just film the main action. Show the crowd, decorations, and behind-the-scenes moments. This makes your event video coverage feel full and exciting.
Framing and Composition
Great event video production needs strong framing and composition. You want every shot to look balanced and interesting. Here are some easy ways to do that:
-
Use the rule of thirds. Imagine your screen split into nine boxes. Place important things along the lines or where they cross.
-
Look for lines in the room, like walls or tables. Use these to guide the viewer’s eyes to your subject.
-
Frame your subject with doors, windows, or decorations. This adds depth and makes your subject stand out.
-
Try different angles. Shoot from above to make someone look small or from below to make them look powerful.
-
Change your focus. Blur the background to make your subject pop.
-
Adjust your camera settings. Change the shutter speed, aperture, and exposure to get the look you want.
-
Remember, these are just guidelines. Feel free to try new things and see what works best for your event video.
Note: Good composition helps you capture the atmosphere and keeps your event video from looking empty. Show groups of people, busy areas, and fun details to make the event feel lively.
Working with Light and Sound
Lighting and sound can make or break your event video. You want your footage to look bright and your audio to sound clear. Here’s how you can do it:
-
Test your lights and microphones before the event starts. Run through your cues and check for problems.
-
Use three-point lighting if you can: a main light, a fill light, and a backlight. This setup makes people look their best.
-
Place your microphones close to the action. Use high-quality mics and check your audio levels often.
-
Always have backup audio gear, like extra mics or recorders, in case something fails.
-
Try smart lighting, like LED panels, for easy changes and cool effects. Adjust the color and brightness to match the mood.
-
Talk with your team during the event. Use headsets or phones to fix problems fast.
-
Set up a cue system. This helps everyone know when to change lights or sound for big moments.
| Use Case | |
|---|---|
| Ambient Lighting | General room light |
| Accent Lighting | Highlighting speakers or displays |
| Task Lighting | Focused on work areas |
| Decorative Lighting | Adds style and mood |
| LED/Smart Lighting | Easy to control and energy efficient |
| Sound Equipment | Use Case |
|---|---|
| Handheld Mic | Interviews, speeches |
| Lavalier Mic | Hands-free, hidden on clothing |
| Headset Mic | Presenters who move a lot |
| Speakers/Subwoofers | Clear, powerful sound |
| Mixing Console | Balances all audio sources |
Tip: Always check your lighting and sound during the event. Adjust as needed to keep your event video production looking and sounding great.
Corporate Event Videography
Special Considerations
Corporate event videography brings its own set of challenges. You need to prepare more than you would for other types of events. You must look professional and act with confidence. Here are some things you should always keep in mind:
-
Use the right gear. Bring a DSLR or mirrorless camera with manual controls. Add a tripod for steady shots. Pack lavalier or shotgun microphones for clear audio. Lighting kits help you handle formal settings.
-
Talk with event organizers before the big day. Ask about their vision and what they want to see in the final video. Walk through the venue to check lighting and sound.
-
Make a shot list. Write down every key moment you need to capture. This keeps you organized and helps you meet business goals.
-
Dress well and act professionally. You represent your client’s brand.
-
Plan your editing. You need to use professional software to create a video that matches the company’s message. Focus on flow and continuity.
-
Deliver the video in the right format. Most companies want high-quality files for marketing or branding.
Tip: Corporate event videography is all about telling a story that fits the company’s goals. You need to show the event’s purpose and highlight key messages.
Capturing Leadership and Highlights
When you film leadership speeches and event highlights, you want to make every moment count. Leaders often set the tone for the whole event. Here are some ways to capture them at their best:
-
Place your camera at eye level with the speaker. This makes the video feel personal.
-
Use a lavalier mic for clear sound. Test audio before the speech starts.
-
Watch for confident body language. Open gestures and steady eye contact look great on camera.
-
Focus on one main idea in each speech segment. Short, clear messages work best.
-
Capture stories and real moments. Leaders often share personal stories that connect with the audience.
-
Adjust your shots based on the crowd’s reaction. If people laugh or clap, show their faces.
-
Use visuals like slides or graphics if the speaker uses them. This adds interest and helps viewers remember key points.
Note: In corporate event videography, you want to create a highlight reel that shows the energy of the event. Mix speeches, crowd reactions, and fun moments to tell a complete story.
Editing Event Videos
Organizing Footage
When you finish filming an event video, you might feel overwhelmed by all the clips. Start by sorting your video content into folders. Name each folder by part of the event, like “ceremony,” “speeches,” or “crowd shots.” This makes it easy to find what you need later. You can use color labels or tags in your editing software to mark the best moments. Keeping your visual content organized saves you time and helps you focus on the story.
Basic Editing Steps
Jump into video editing by picking out the most important clips first. The 80/20 rule says that 80% of your results come from 20% of your effort. Focus on the key footage and main story. Don’t get stuck on tiny details right away. Start with these steps:
-
Import your organized footage into your editing program.
-
Make a rough cut by placing the best clips on the timeline.
-
Trim out mistakes or boring parts.
-
Arrange the clips to tell a clear story.
You can add transitions and effects later, but remember, most of the impact comes from strong visual storytelling and clear structure.
Adding Music and Titles
Music sets the mood for your event video. Choose music that matches the event’s energy. Always check if you need a license for the song. Royalty-free music is a safe choice for most projects. If you use copyrighted music, make sure you get permission and follow the rules. Add simple titles to introduce speakers or highlight key moments. Good music and titles help your video content feel polished and professional.
Tip: Budget for music licensing. Plan to spend about 10-15% of your project budget on music if you want something special.
Exporting and Backup
When you finish post-production editing, export your event video in the format your client needs. Save a high-quality version for yourself. Use the 3-2-1 backup strategy to protect your work. Keep three copies of your video: two on different drives and one off-site, like in the cloud. This keeps your video editing projects safe from accidents or computer problems.
Note: Backing up your event video means you never lose your hard work, even if something goes wrong.
Delivering the Final Event Video
Choosing Formats
Picking the right video format helps you share your event videos easily. Most clients want their videos as MP4 files. This type of file works on almost any device. You usually give videos in 1080p, which looks clear and sharp. MP4 files use the H.264 codec, so your video plays well and does not get too big. Many clients like getting their videos on USB sticks, especially for post-event recap projects. If your video is bigger than 4GB, you may need to use NTFS formatting for the USB drive. Some clients still want DVDs, but USB sticks are more common now. Sometimes, you might need to give both options to make sure everyone is happy.
-
MP4 (H.264, 1080p) for most event marketing videos
-
USB stick delivery for easy sharing
-
DVD as a backup if requested
Tip: Always ask your client which format they want before you finish your event marketing project.
Sharing with Clients
You want your clients to get their event videos fast and safely. Cloud platforms like VIDIZMO help you share big files without problems. These sites make your videos smaller, stream them well, and keep them safe. You can also use services like Showell to send a special link to your client. This way, you do not have to use email attachments and your files stay safe. Showell lets you set passwords or end dates for extra safety. For very private event videos, you can use secure portals like TitanFile. These tools protect your files with encryption and let you work with your client. If your client needs a physical copy, you can use a USB stick, but cloud sharing is usually faster and safer for most event videos.
Getting Feedback
Feedback helps you get better as an event videographer. After you send your event video, ask your client to fill out a short survey or answer a few questions by email. Ask what they liked and what you could do better. Many people look for patterns in this feedback to improve future event videos. You can also see how people watch your videos by checking view counts, likes, and watch times. These numbers show what people enjoy and where they stop watching. Some videographers use live polls or emoji reactions during event videos to get quick feedback and make the video more fun. Tools like Zigpoll or Slido help you collect and check answers easily. This feedback helps you make better videos and build good relationships with your clients.
Note: Every bit of feedback, from surveys to stats, helps you make your next event video even better.
Troubleshooting and Tips
Common Issues
You might run into problems during event video production. Some issues pop up more than others. You could see connectivity problems, video playback errors, or trouble with color calibration. Sometimes, your video and audio don’t match up. Mixing signals from different cameras can get confusing. You can fix these problems by checking your gear before the event. Regular maintenance helps a lot. If you see a playback error, restart your device or switch cables. For color issues, use your camera’s color settings and test shots. When things get tricky, talk with your team. Experienced crew members like Video Engineers and Technical Directors know how to solve problems fast. They help set up equipment, manage crews, and keep everything running smoothly. Good communication and teamwork make a big difference.
Tip: Always do a quick test of your video and audio before guests arrive. This helps you catch problems early.
Quick Fixes
You don’t need fancy tools to solve most problems. Here are some quick fixes you can try:
-
Swap out cables if you lose connection.
-
Restart your camera or computer to fix playback errors.
-
Adjust your camera’s white balance for better color.
-
Use backup microphones if your main one fails.
-
Ask your team for help if you get stuck.
-
Keep extra batteries and memory cards handy.
| Problem | Quick Fix |
|---|---|
| No video signal | Check cables, restart gear |
| Bad color | Adjust white balance |
| Audio issues | Switch microphones |
| Playback error | Reboot device |
Note: Stay calm when something goes wrong. Most problems have simple solutions.
Building Your Portfolio
You want your portfolio to stand out. Start by picking your best work. Focus on the type of client you want. Don’t show old or weak projects. Make your portfolio easy to use. Let your videos speak for themselves. Show what makes your style unique. Add a demo reel and galleries to display variety. Include behind-the-scenes clips to show how you work. You can do personal projects to attract clients. Sometimes, working for free or at a lower fee helps you build credibility. Shadowing experienced videographers gives you great experience. Use a logo and keep your design consistent. Always add a clear call to action so clients know how to reach you.
🚀 Pro Tip: A strong portfolio helps you get noticed and book more events. Keep it fresh and simple!
You’ve learned how to plan, shoot, edit, and deliver event videos. Each step gets easier with practice. Using a checklist helps you remember key shots, permissions, and deadlines. It keeps your work organized and smooth.
-
Brief your team on what to capture and when.
-
Set up cloud storage for your files.
-
Create a shared planning board for tasks and deadlines.
Keep learning and try new things at every event. Remember, every pro started as a beginner—so keep going and have fun!
FAQ
How do I avoid shaky footage at events?
Use a tripod or gimbal for steady shots. Hold your camera with both hands and keep your elbows close to your body. Practice smooth movements. If you shoot handheld, try to stay as still as possible.
Tip: Slow, steady breathing helps you keep your hands calm.
What should I do if my audio sounds bad?
Check your microphone connection first. Move the mic closer to your subject. If you hear noise, switch to a backup mic. Always monitor your audio with headphones during the event.
How much footage should I record?
Record more than you think you need. Get wide shots, close-ups, and reaction shots. Extra footage gives you more choices when you edit. You can always cut out what you don’t need later.
Can I use my phone for event videography?
Yes, you can start with your phone. Use a tripod and an external microphone for better results. Clean your lens before filming. Many phones shoot in HD or 4K, which works well for most events.
Note: Good lighting makes phone videos look much better.