Skip to content

The exposure triangle helps you balance light to achieve a well-exposed photo. You control this balance using three key settings on your camera:
Component | Definition |
|---|---|
Aperture | Controls the amount of light entering the camera, affecting depth of field and exposure. |
Shutter Speed | Determines how long the camera’s sensor is exposed to light, influencing motion blur. |
ISO | Adjusts the camera’s sensitivity to light, impacting image brightness and noise levels. |
Mastering the exposure triangle gives you creative power. When you experiment with these settings, you learn how to adjust for different lighting and create unique effects.
Try different combinations to improve your skills.
Adjust one setting and balance with another for proper exposure.
Use these tools to control depth of field, motion, and texture.
Adapt to any lighting condition with confidence.
Key Takeaways
The exposure triangle consists of aperture, shutter speed, and ISO. Mastering these settings helps you achieve well-exposed photos.
Experiment with different combinations of settings to improve your photography skills. Adjust one setting and balance it with the others for the best results.
Use a wide aperture for portraits to create a soft background. For landscapes, a smaller aperture keeps the entire scene in focus.
Control motion in your photos by adjusting shutter speed. A fast shutter freezes action, while a slow shutter captures movement.
Keep ISO low for better image quality. Raise it only in low-light situations to avoid grainy photos.
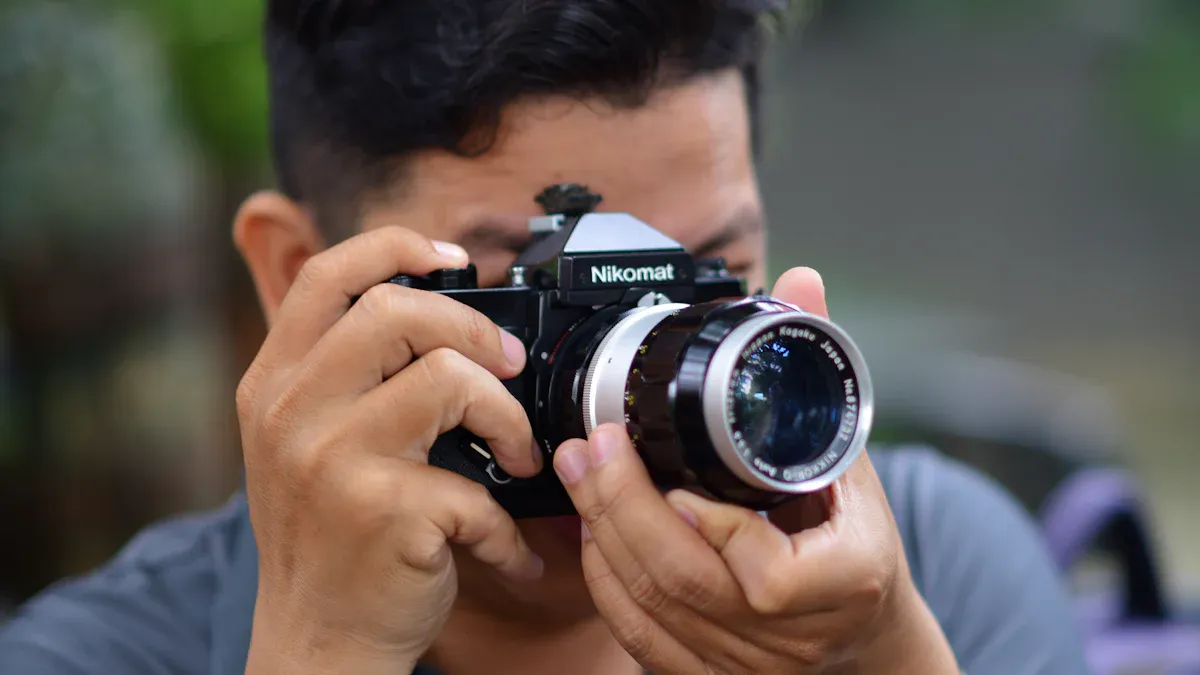
Understanding the Exposure Triangle

What is the Exposure Triangle?
You can think of the exposure triangle as the foundation of photography. It describes the relationship between three camera settings: aperture, shutter speed, and ISO. Each setting controls how much light reaches your camera’s sensor. When you adjust these settings, you change the brightness and quality of your photos.
The exposure triangle is the framework for controlling light in your photographs. It consists of three interdependent elements: aperture, shutter speed, and ISO. Mastery of these elements allows photographers to achieve a perfect balance, producing well-exposed images in a variety of lighting conditions.
Professional photographers often describe the exposure triangle as a three-part relationship. Each part affects the amount of light that reaches your camera’s sensor. This balance is crucial for both technical accuracy and creative expression in photography.
Aperture controls the amount of light entering the lens and affects depth of field.
Shutter Speed determines how long the sensor is exposed to light, influencing motion capture.
ISO adjusts the sensor’s sensitivity to light, impacting image quality in various lighting conditions.
When you understand how these three elements work together, you can take control of your camera. You can make choices that fit the scene and your creative vision.
Why the Exposure Triangle Matters
The exposure triangle matters because it gives you the power to create the photos you imagine. You can use it to solve problems in different lighting situations and to add creative effects to your images.
The exposure triangle consists of three elements: aperture, shutter speed, and ISO.
Each element interacts with the others, allowing adjustments based on available light.
Manipulating these settings enhances the success rate of capturing well-exposed images, especially in challenging lighting conditions.
You can use the exposure triangle to make your photos stand out. For example:
Portraits: A wide aperture isolates the subject, enhancing emotional engagement.
Macro Photography: A wide aperture highlights intricate details against a soft background.
Landscape Photography: A narrow aperture ensures sharpness throughout the scene.
Creative Backgrounds: Different aperture settings create unique bokeh effects, enhancing the overall composition.
When you master the exposure triangle, you gain more than just technical skill. You gain the ability to express your ideas and capture moments exactly as you see them. This knowledge helps you adapt to any lighting condition and achieve the results you want.
Aperture Basics

Aperture and Exposure
Aperture controls how much light enters your camera. You can think of it as the opening in your lens. A larger opening lets in more light, while a smaller opening lets in less. The size of the aperture is measured in f-stop values, such as f/1.4, f/2.8, or f/16. Lower f-stop numbers mean a bigger opening and more light. Higher f-stop numbers mean a smaller opening and less light.
A larger aperture allows more light to hit the sensor, which is important for proper exposure, especially in low-light conditions.
The f-stop value shows the size of the aperture and affects how much light passes through the lens.
A fast aperture, like f/1.4, creates a bigger hole and lets in more light than a slower aperture, like f/11.
Choosing a fast lens helps you gather more light, which is useful in dark places.
A faster aperture lets you keep ISO low or use a quicker shutter speed.
When you shoot in low light without a tripod, use a large aperture like f/1.8 to make sure enough light reaches the sensor. In bright sunlight, a smaller aperture like f/11 helps control exposure and keeps your image from looking washed out. Each step up in f-stop value cuts the light in half, while each step down doubles the light. This lets you balance aperture with shutter speed and ISO, which is key to mastering the exposure triangle.
Depth of Field
Aperture also changes how much of your photo looks sharp. This is called depth of field. A wide aperture, such as f/2.8, gives you a shallow depth of field. This means your subject stays sharp, but the background looks blurry. Photographers often use this effect in portraits to make the person stand out.
For portraits, wide apertures like f/2.8 or f/4 create a soft, blurry background.
If you want more of the scene in focus, like in landscapes, use a smaller aperture such as f/11 or f/16.
Landscape photography often needs different aperture settings, depending on the scene.
Changing the aperture size directly affects depth of field. A wide aperture isolates your subject and creates a strong background blur. A small aperture brings more of the scene into focus, which is great for storytelling in your photos. By understanding how aperture works, you gain more creative control within the exposure triangle.
Shutter Speed Essentials
Shutter Speed and Exposure
Shutter speed controls how long your camera’s sensor collects light. You set this time in fractions of a second, like 1/500 or 1/30. A fast shutter speed, such as 1/1000, keeps the shutter open for a very short time. This lets in less light and makes your photo darker. A slow shutter speed, like 1/10, keeps the shutter open longer. This allows more light to reach the sensor and makes your photo brighter.
Tip: If you shoot in bright sunlight, use a faster shutter speed to avoid overexposed images. In low light, slow down your shutter speed to let in more light.
Changing the shutter speed directly affects your exposure. When you adjust this setting, you must also think about the other parts of the exposure triangle—aperture and ISO—to keep your photo balanced. If you use a fast shutter speed, you may need a wider aperture or higher ISO to get enough light. If you use a slow shutter speed, you can often use a smaller aperture or lower ISO.
When you choose a shutter speed, ask yourself these questions:
Is my subject moving?
How much light do I have?
Am I using a tripod?
Experiment with different shutter speeds in various lighting conditions. This helps you understand how each setting changes your images.
Motion Blur
Shutter speed also controls how you capture movement. A fast shutter speed freezes action. For example, if you photograph a soccer game, try 1/500 of a second to make the players look sharp and clear. A slow shutter speed creates motion blur. This effect shows movement and adds energy to your photos. In sports photography, you might use a slower shutter speed on purpose to show the speed of a runner or a cyclist.
To capture movement, decrease your shutter speed.
Shutter speed changes the mood of your photo. A sharp, frozen image feels dramatic and intense. A blurred image feels soft and dreamy. You can use this control to tell different stories with your camera. By understanding how shutter speed fits into the exposure triangle, you gain more creative options for every scene.
ISO Fundamentals
ISO and Exposure
ISO controls your camera’s sensitivity to light. When you set a low ISO value, like ISO 100, your camera sensor becomes less sensitive. This works well in bright sunlight or well-lit rooms. If you use a higher ISO, such as ISO 800 or ISO 3200, your camera sensor becomes more sensitive to light. This helps you take brighter photos in dim places.
ISO values play a big role in the exposure triangle. You can use a higher ISO to get a good exposure when you cannot open the aperture wider or slow down the shutter speed. For example, if you take photos indoors or at night, raising the ISO helps you capture enough light. Lower ISO values, like ISO 100 or ISO 200, give you cleaner images but may not work well in dark settings.
Tip: Use the lowest ISO possible for the best image quality. Raise the ISO only when you need more light.
Higher ISO values (like 3200 or 6400) make your camera more sensitive to light, so your photos look brighter in low-light scenes.
Lower ISO values (like 100 or 200) reduce sensitivity, which can make photos too dark if there is not enough light.
ISO helps you balance the exposure triangle, especially when lighting conditions change.
Noise and Low Light
When you increase ISO, you also increase the chance of noise in your photos. Noise looks like tiny colored dots or grain, especially in the dark parts of your image. This happens because higher ISO settings amplify both the light signal and the unwanted electronic signals in your camera sensor.
Higher ISO settings can make noise more visible, especially in shadows or dark areas.
Noise becomes a bigger problem in low-light situations, where your camera struggles to collect enough light.
Raising ISO can also lower the dynamic range, so details in dark areas may look grainy or blotchy.
You can reduce noise by using a lower ISO whenever possible. Many photographers use a tripod to keep ISO low and avoid blur from slow shutter speeds. Shooting in RAW format helps you fix noise later with editing software. Some cameras have built-in noise reduction features, and you can also use programs like Adobe Lightroom or special tools like Topaz DeNoise AI to clean up your images.
Note: If you must use a high ISO, try to expose your photo as well as possible in-camera. This makes it easier to remove noise later.
Understanding ISO gives you more control over the exposure triangle. You can make smart choices in any lighting situation and create better photos with less noise.
Balancing the Exposure Triangle
Adjusting Settings Together
You can achieve the right exposure by adjusting aperture, shutter speed, and ISO together. These three settings work like the corners of a triangle. When you change one, you must adjust at least one of the others to keep your photo balanced.
If you open the aperture wider to let in more light, you may need to use a faster shutter speed to avoid overexposing your image.
When you increase ISO to make your camera more sensitive to light, you might need a smaller aperture or a faster shutter speed to keep the photo from getting too bright.
If you want to freeze action with a fast shutter speed, you may need to open the aperture or raise the ISO to let in enough light.
Tip: Changing one setting in the exposure triangle always affects the others. You must balance all three to get the best results.
Here are some practical examples:
Shooting indoors with low light? Open the aperture and raise the ISO, then use a slower shutter speed if needed.
Photographing a bright outdoor scene? Lower the ISO, use a smaller aperture, and choose a faster shutter speed.
A triangle diagram helps you remember how these settings connect. Each side supports the others, and together they create a balanced photo.
Creative Effects
You can use the exposure triangle to create different artistic effects in your photos.
A wide aperture (low f-stop) gives you a shallow depth of field, making your subject stand out with a blurry background.
A fast shutter speed freezes motion, perfect for sports or wildlife photography.
A slow shutter speed creates motion blur, which can show movement in water or traffic.
Adjusting ISO helps you shoot in low light while keeping your image clear.
Note: When you reach the limit of one setting, adjust the other two to keep your exposure balanced and maintain image quality.
Infographics and triangle diagrams can help you visualize how aperture, shutter speed, and ISO work together. These tools make it easier to remember how to balance your camera settings for both technical accuracy and creative expression.
You gain better photos when you master the exposure triangle. You learn how to control light and create the images you want. Many photographers report that understanding aperture, shutter speed, and ISO helps them focus on creative ideas instead of just technical settings.
Try changing each setting one at a time to see how your photos change.
Practice in different lighting and watch how your skills grow.
Experimenting with these settings gives you more creative control and helps you make informed choices every time you take a picture.
FAQ
What happens if you only change one setting in the exposure triangle?
If you change only one setting, your photo may become too bright or too dark. You need to adjust the other two settings to keep the exposure balanced.
Why does ISO make photos look grainy?
When you raise ISO, your camera sensor becomes more sensitive to light. This can add grain, called “noise,” to your photos. You see this most in dark areas.
How do you choose the right aperture for portraits?
You should use a wide aperture, like f/1.8 or f/2.8. This setting blurs the background and makes your subject stand out. It helps you create a soft, pleasing look.
Can you use auto mode and still control the exposure triangle?
Auto mode sets aperture, shutter speed, and ISO for you. If you want full control, use manual or semi-manual modes like Aperture Priority or Shutter Priority.