Skip to content
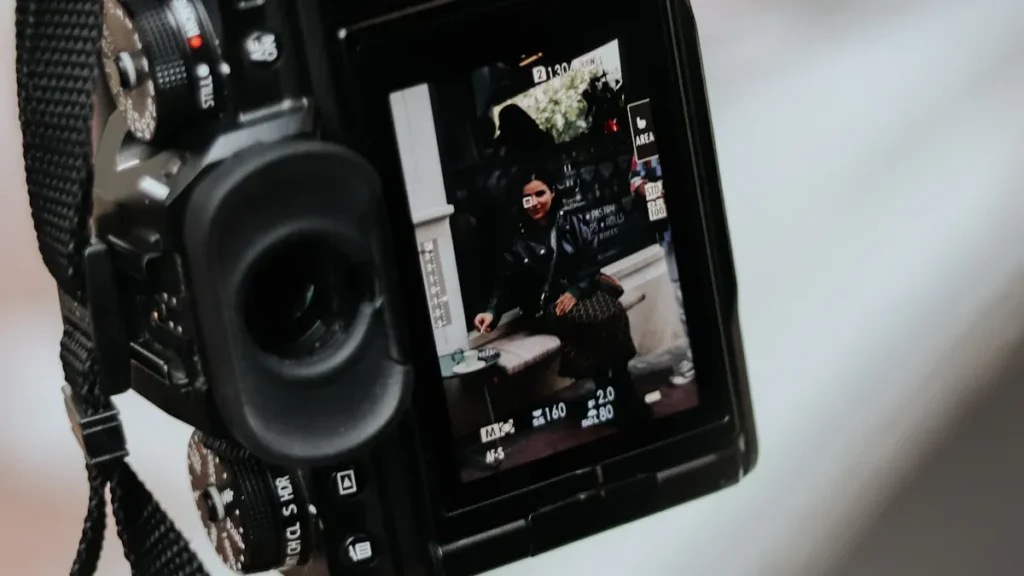
You want to take better photos, right? Learning the exposure triangle helps you make photos look how you want. The exposure triangle uses aperture, shutter speed, and ISO. Each one changes how much light is in your picture. These settings also change blur, sharpness, and noise. If you balance these settings, your photo will look just right. Many new photographers think this is hard at first, but you can do it. Try using manual mode and test different lighting. Watch how your pictures look different. Practice will help you learn the exposure triangle and make you feel sure of yourself.
Key Takeaways
-
The exposure triangle has aperture, shutter speed, and ISO. These three work together to control light. They also change how your photo looks.
-
Use aperture to change how bright your photo is. It also changes how blurry the background looks. Wide apertures make backgrounds blurry. Narrow apertures keep more things sharp.
-
Change shutter speed to freeze action or show blur. Fast shutter speeds stop movement. Slow shutter speeds make blur effects.
-
Keep ISO low so your photos are not grainy. Only raise ISO when you need more light in dark places.
-
Balance all three settings by changing one at a time. Check your photo after each change. Practice using manual mode to get better and feel sure of yourself.
Exposure Triangle Basics
What Is the Exposure Triangle
You might wonder what the exposure triangle really means. Think of it as the three main controls that decide how your photo looks. The components of exposure are aperture, shutter speed, and ISO. Each one changes the amount of light that reaches your camera’s sensor. Aperture is the opening in your lens. A wide aperture lets in more light and can blur the background. A narrow aperture lets in less light and keeps more of the scene sharp. Shutter speed is how long your camera’s sensor gets exposed to light. A fast shutter speed freezes action, while a slow one can show motion blur. ISO is your camera’s sensitivity to light. A low ISO keeps your photo clear, but a high ISO can make it brighter when there isn’t much light—though it might add some grain.
All three work together. If you change one, you often need to adjust the others. For example, if you let in more light with a wide aperture, you might need a faster shutter speed or a lower ISO to keep the photo from getting too bright. This balance is what makes the exposure triangle so important.
Why It Matters
Understanding the exposure triangle gives you control. You don’t have to rely on your camera’s auto mode. You get to decide how much light you want, how sharp or blurry your photo looks, and how much detail you keep in bright or dark areas. When you know how the components of exposure work together, you can make creative choices. You can freeze a soccer player in mid-air or blur a waterfall to show movement. You can shoot in bright sunlight or low light and still get the results you want.
Tip: Practice changing each setting one at a time. Notice how the amount of light and the look of your photo changes. This hands-on approach helps you see how the exposure triangle works in real life.
Aperture Tips
Aperture Explained
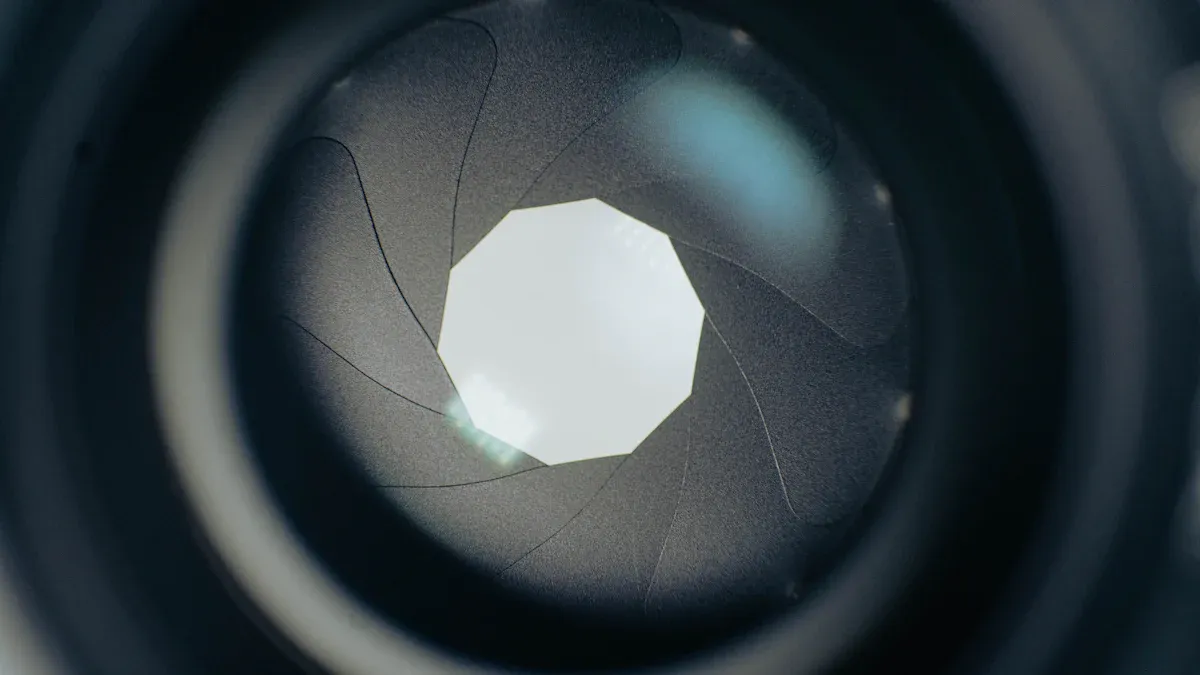
Aperture is the opening inside your camera lens. It controls how much light enters your camera and hits the sensor. Think of it like the pupil in your eye. When you walk into a dark room, your pupil gets bigger to let in more light. In bright sunlight, it gets smaller. The same thing happens with your camera. A wide aperture lets in a large amount of light, making your photo brighter. A small aperture lets in less light, so your photo looks darker. You can change the aperture by adjusting the f-stop number on your camera. Lower f-stop numbers (like f/1.8) mean a wider opening. Higher numbers (like f/16) mean a smaller opening.
Tip: If you want to brighten your photo, try using a wider aperture. This setting is great for indoor or low-light situations.
Depth of Field
Aperture does more than just control the amount of light. It also changes how much of your photo looks sharp. This is called depth of field. When you use a wide aperture (small f-number), you get a blurry background and a sharp subject. This works well for portraits because it makes your subject stand out. If you use a small aperture (large f-number), more of your photo stays in focus. This is perfect for landscapes where you want everything, from the front to the back, to look sharp.
-
For portraits: Try f/2.8 or f/4 for a soft, blurry background.
-
For landscapes: Use f/11 or higher to keep everything clear.
Common Mistakes
Many beginners set the aperture too wide. This can make it hard to keep your whole subject in focus, especially if they move. Sometimes, people use a wide aperture for action shots, but this makes it tricky to get sharp photos. You might also forget to check if your focus is on the right spot. To avoid these problems:
-
Start with an aperture around f/4 for portraits. This gives you some background blur but keeps more of your subject sharp.
-
Use a smaller aperture for group photos or scenes with lots of detail.
-
Try aperture priority mode. This lets you pick the aperture, and your camera chooses the best shutter speed.
-
Always check your focus point. Make sure it’s on your subject’s eyes or face.
Remember: Mastering aperture helps you control both the look and the brightness of your photos.
Shutter Speed Tips
Shutter Speed Explained
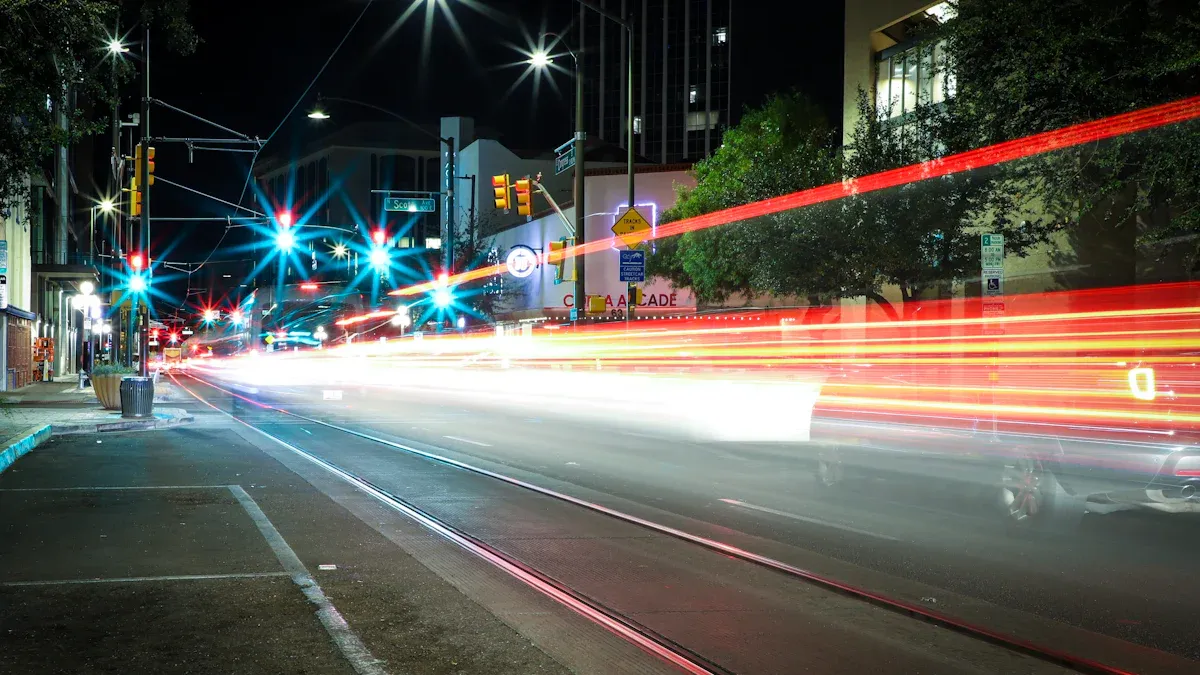
Shutter speed controls how long your camera’s sensor gets exposed to light. You can think of it as a curtain that opens and closes. The longer it stays open, the more light hits the sensor. The shorter it stays open, the less light gets in. Shutter speed is measured in seconds or fractions of a second, like 1/1000 or 1/30. Fast shutter speeds, such as 1/1000, freeze action. Slow shutter speeds, like 1/4, let you show movement with blur. You always need to balance shutter speed with aperture and ISO to get the right amount of light in your photo.
Tip: If your photo looks too dark or too bright, check your shutter speed. Adjust it to control the amount of light reaching your camera.
Motion Effects
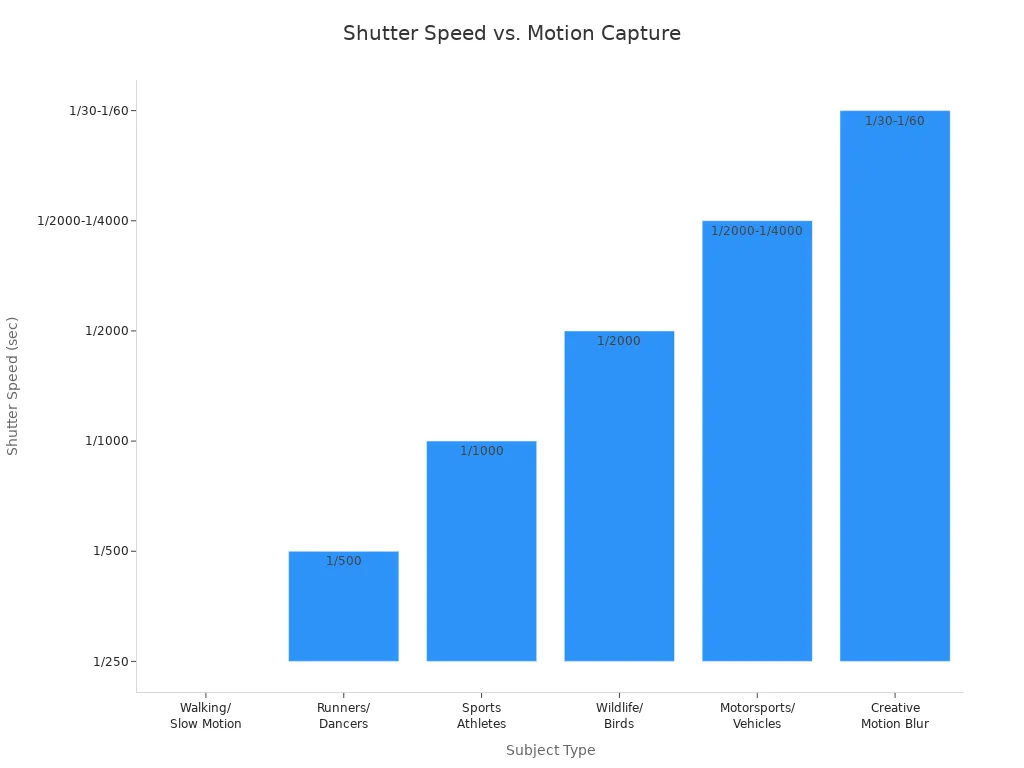
Shutter speed changes how you capture motion. Want to freeze a soccer player in mid-kick? Use a fast shutter speed. Want to show the flow of a waterfall? Try a slow shutter speed. Here’s a quick guide:
| Subject/Scenario | Recommended Shutter Speed | Notes on Motion Capture |
|---|---|---|
| ~1/250 sec | Freezes slow movement | |
| Fast-Moving People | ~1/500 sec | Good for running or dancing |
| Cars, Birds in Flight | 1/2000 sec or faster | Needed to freeze very fast subjects |
| Creative Motion Blur | 1/30 sec or slower | Shows movement trails |
You can use slow shutter speeds for creative effects. Try panning with your subject to keep them sharp while the background blurs. This makes your photos look dynamic and fun.
Mistakes to Avoid
Many new photographers use auto mode and miss out on creative control. You might also pick a shutter speed that is too slow, which causes blurry photos. To avoid this, use the reciprocal rule: set your shutter speed at least as fast as the focal length of your lens (for example, 1/50s for a 50mm lens). If you want to freeze action, go even faster. In low light, you may need to raise your ISO or open your aperture to keep your shutter speed fast enough. Remember, if you lower your shutter speed to let in more light, you risk blur from camera shake or subject movement.
Note: If you see blur, check if it’s from slow shutter speed or missed focus. Use shutter priority mode to practice picking the right speed for your scene.
ISO Tips
ISO Explained
ISO controls how bright your photo looks when you take a picture. You might think ISO changes how sensitive your camera is to light, but that’s not exactly true. ISO actually works by amplifying the signal your camera sensor receives. When you raise the ISO, your camera boosts both the light signal and any noise in the image. This makes your photo brighter, even if the amount of light coming into the camera stays the same. Think of it like turning up the volume on a radio. You hear the music louder, but you also hear more static. Lower ISO values, like 100 or 200, keep your photos clean and clear. Higher ISO values, like 1600 or more, make your photos brighter but can add grain or noise.
Image Quality
You want your photos to look sharp and clean. Using a low ISO helps you get the best image quality. At low ISO, your camera doesn’t need to amplify the signal much, so you see less noise. When you increase ISO, you make the image brighter, but you also make any noise more visible. This can make your photo look grainy, especially in dark areas. Modern cameras do a better job at handling noise, but you still get the best results by using the lowest ISO you can for the amount of light you have. Here’s a quick guide to help you choose the right ISO:
| ISO Range | When to Use | Notes on Quality |
|---|---|---|
| Bright daylight, outdoors | Cleanest, least noise | |
| 400-1600 | Indoors, cloudy days | Some noise, still good quality |
| 1600+ | Night, concerts, fast action | More noise, use if needed |
Tip: If you need a faster shutter speed or smaller aperture but don’t have enough light, raise your ISO just enough to get a good exposure.
ISO Mistakes
Many beginners set ISO too high, even when there’s enough light. This adds noise for no reason. Others forget to change ISO back to a lower setting after shooting in the dark. You might also use a high ISO to fix a dark photo, but it’s better to let in more light with your aperture or shutter speed first. Only boost ISO when you can’t get enough brightness any other way. Here’s a chart showing common ISO mistakes:
Note: Always check your ISO before you start shooting. Use the lowest ISO that gives you a bright, clear photo for the amount of light in your scene.
Balancing Settings
Exposure Balance
Getting the right exposure means you need to balance three things: aperture, shutter speed, and ISO. Think of it like collecting rain in a bucket. The aperture is how wide the bucket is. Shutter speed is how long you leave the bucket outside. ISO is how sensitive your bucket is to catching every drop. You can fill the bucket with different combinations. A wide bucket for a short time, or a narrow bucket for a long time, both work. In photography, you can use a wide aperture with a fast shutter speed, or a small aperture with a slow shutter speed, and still get the same exposure.
But each setting changes more than just brightness. Aperture changes how blurry or sharp your background looks. Shutter speed decides if you freeze action or show motion blur. ISO affects how much grain or noise you see. When you change one setting, you often need to adjust these elements to keep your photo looking right. For example, if you open your aperture to blur the background, you might need a faster shutter speed or a lower ISO to avoid making the photo too bright.
Tip: Always check your photo after you take it. If it looks too bright or too dark, try changing one setting at a time and see how it affects the picture.
Manual Photography Settings
When you use manual photography settings, you control all three parts of the exposure triangle. This gives you the power to make your photos look exactly how you want. Here’s a simple step-by-step guide to help you balance your settings:
-
Pick your aperture first. Decide if you want a blurry background (wide aperture, low f-number) or everything sharp (narrow aperture, high f-number).
-
Set your shutter speed. Think about your subject. If it moves fast, use a quick shutter speed to freeze it. If you want to show motion, use a slower speed.
-
Adjust your ISO last. Start with the lowest ISO for the best quality. Raise it only if your photo is too dark after setting aperture and shutter speed.
Let’s say you want to take a portrait outside on a sunny day. You pick a wide aperture for a soft background. The photo looks too bright, so you use a faster shutter speed. If it’s still too bright, lower your ISO. If you move indoors and it gets darker, you can open your aperture more, slow down your shutter speed, or raise your ISO. You always need to adjust these elements together to get the right exposure and the creative look you want.
Quick Reference
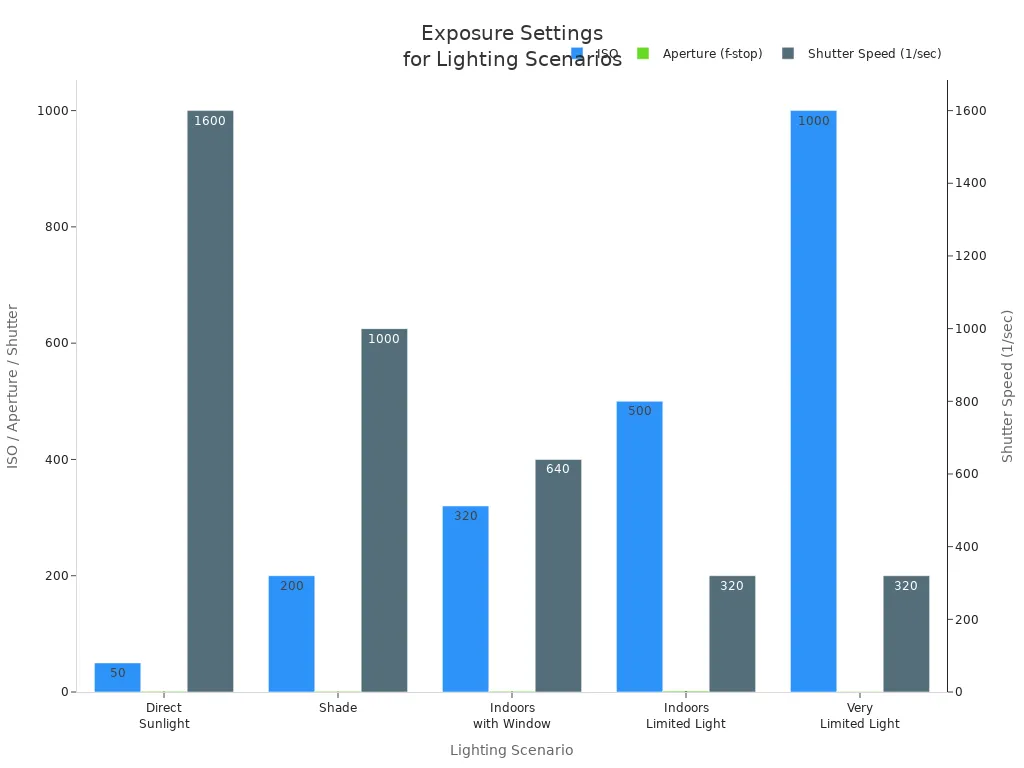
You don’t have to guess every time you shoot. Use quick reference charts to help you choose your settings for different lighting situations. Here’s a handy table you can use:
| Lighting Scenario | ISO | Aperture (f-stop) | Shutter Speed | What to Remember |
|---|---|---|---|---|
| Direct Sunlight | 50 | f/2.0 | 1/1600 | Use lowest ISO; fast shutter speed; wide aperture for background blur. |
| Shade | 200 | f/1.8 | 1/1000 | Slightly higher ISO; wide aperture; fast shutter speed. |
| Indoors with Window Light | 320 | f/2.2 | 1/640 | Higher ISO; wide aperture; fast shutter speed for moving subjects. |
| Indoors with Limited Light | 500 | f/2.8 | 1/320 | Higher ISO; wide aperture; slower shutter speed. |
| Very Limited Light | 1000 | f/1.4 | 1/320 | Highest ISO; widest aperture; balance shutter speed to avoid blur. |
Here are some quick tips to remember when you balance your settings:
-
If you make your aperture wider (lower f-number), use a faster shutter speed or lower ISO.
-
If you use a slower shutter speed, close your aperture more (higher f-number) or lower ISO.
-
If you raise your ISO, you can use a faster shutter speed or a smaller aperture, but watch out for noise.
-
Always try to use the lowest ISO possible for the best image quality.
Note: Many photographers use cheat sheets or exposure calculators to help them balance the exposure triangle quickly. These tools can save you time and help you learn faster.
The exposure triangle works like a team. Each part affects the others. When you change one, you must adjust the others to keep your photo looking great. With practice, you’ll get faster and more confident at finding the perfect balance.
Troubleshooting
Overexposure
Have you ever taken a photo that looks way too bright? Overexposure happens a lot, especially when you shoot in harsh sunlight or use a high ISO in bright places. Sometimes, your camera’s auto settings or metering can get confused and let in too much light. You might also leave the shutter open too long in a well-lit scene. When this happens, you lose details in the bright areas, and your photo looks washed out.
To fix overexposure, try these steps:
-
Lower your ISO if you’re shooting in bright light.
-
Use a faster shutter speed to let in less light.
-
Close your aperture (use a higher f-stop number).
-
Move to a shadier spot or change your angle to avoid direct sunlight.
-
Shoot in RAW format. This gives you more room to fix exposure in editing apps like Lightroom or Photoshop.
Tip: If you can’t save an overexposed photo, you can get creative. Try turning it into a high-key image by adjusting the contrast and highlights to make the brightness look intentional.
Underexposure
Underexposed photos look too dark. You might see this when you use a low ISO, a small aperture (high f-stop), or a fast shutter speed in a dark place. Not enough light reaches your camera sensor, so details hide in the shadows.
You can fix underexposure by:
-
Raising your ISO to make your camera more sensitive to light.
-
Opening your aperture (lower f-stop) to let in more light.
-
Slowing down your shutter speed so the sensor gets more light.
-
Checking your histogram to make sure your photo has a good balance of light and dark.
Note: If you slow your shutter speed, use a tripod to keep your photo sharp.
Blurry or Noisy Photos
Blurry photos often happen when your shutter speed is too slow or your camera shakes. Noisy photos show grain, especially when you use a high ISO in low light.
Here’s how you can fix these problems:
-
Use the lowest ISO you can for your scene to keep noise down.
-
Add more light with a flash or by moving closer to a window.
-
Use a tripod or set your camera on a steady surface for long exposures.
-
Shoot in RAW so you can reduce noise better in editing.
-
Try in-camera noise reduction features if your camera has them.
-
In editing, use tools like Lightroom or AI noise reduction apps to clean up your image.
-
For blur, make sure your shutter speed is fast enough for your subject. If you need to go slower, use a remote shutter or timer.
Remember: Balancing your exposure triangle settings helps you avoid most of these problems. Practice and check your photos as you go, and you’ll get better every time!
You now know how aperture, shutter speed, and ISO work together to control light in photos. Here’s what expert photographers recommend:
-
Begin with aperture if you want to change how much of your photo is sharp or blurry.
-
Change shutter speed to either stop action or show movement.
-
Use ISO to make your photo brighter, but be careful because it can add grain.
-
Try taking pictures in different kinds of light and look at how they turn out.
If you keep practicing with manual settings, you will get better and feel more sure of yourself. Making mistakes is okay because they help you learn. Try new things, join groups for photographers, and show others your pictures. Pick up your camera and try different ideas. Your photos will get better every time! 📷
FAQ
What is the best setting to start with when shooting in manual mode?
You can start with aperture. Pick a wide aperture for blurry backgrounds or a narrow one for sharp scenes. Then set your shutter speed and ISO to get the right brightness.
How do I know if my photo is overexposed or underexposed?
Check your camera’s screen. If your photo looks too bright, it’s overexposed. If it looks too dark, it’s underexposed. You can also look at the histogram for a quick guide.
Tip: Adjust one setting at a time and watch how your photo changes.
Why do my photos look grainy at night?
You probably used a high ISO. High ISO makes your camera more sensitive to light, but it also adds grain, called noise. Try using a tripod and a lower ISO for cleaner photos.
Can I fix exposure mistakes after taking a photo?
Yes! If you shoot in RAW, you can fix many exposure problems on your computer. Editing apps like Lightroom help you recover details from bright or dark areas.
Note: It’s easier to fix small mistakes than big ones, so check your settings before you shoot.