 Skip to content

Getting ready and paying attention to small things can help you do better in outside video interviews. Many people have trouble with issues like loud sounds, bad lighting, or shirts with wild designs that distract from the conversation. You might feel nervous about appearing stiff or forgetting simple manners, such as making eye contact or turning off your phone. If you follow the right steps, you can prevent these problems and ensure your outside video interviews are polished and engaging every time.
Key Takeaways
-
Pick a quiet place that looks nice for your interview. Go to the spot before to check for loud sounds and light.
-
Use simple backgrounds that help your message. Stay away from things that can distract people. This keeps the focus on the person being interviewed.
-
Pick the right tools, like a good camera and microphone. Try out your equipment before filming to stop problems.
-
Use natural light in a smart way. Film during the golden hour for the best light. Use reflectors to make strong sunlight softer.
-
Get ready for surprises like weather or noise. Bring extra gear and have a plan to handle any problem.
Planning Outside Video Interviews
Careful planning helps you create a professional and smooth experience when shooting an interview outdoors. You need to think about where you will film, what will be in the background, and how to keep distractions away. Good planning also lets you use a minimalist setup, which saves money and still looks professional.
Location Choice
Choosing the right place is the first step for a successful interview. You want a spot that looks good and sounds quiet. Here are some things to check:
-
Pick a location far from loud places like airports or construction sites.
-
Listen for noises that might pop up, such as traffic or people talking.
-
Visit the spot at different times to see if the sound changes.
-
Look at how the sunlight hits the area during the day.
-
Decide if you need extra lights to make your video look better.
-
Check if the light creates harsh shadows or makes the video too bright.
Tip: Always visit your location before the interview. Stand there and listen. Watch how the light changes. This helps you avoid surprises on the day of the shoot.
Assessing Backgrounds
The background in your video can change how people feel about your interview. You want a background that matches your message and keeps the focus on the person speaking. Here is a table showing how different backgrounds can affect the mood:
| Backdrop Type | Emotional Impact |
|---|---|
| Dark, Moody | Adds drama and seriousness |
| Bright, Colorful | Brings happiness and energy |
| Blurred Background | Keeps attention on the speaker, looks stylish |
| Vintage-themed | Feels warm and nostalgic |
| Futuristic | Looks modern and innovative |
Natural backgrounds, like trees or parks, help people relax and think better. They also make the interview feel more creative and friendly. When you choose a background, make sure it does not distract from the main subject. This helps you create an appropriate interview environment.
Managing Distractions
Distractions can ruin even the best outside video interviews. You want your viewers to focus on the conversation, not on things happening in the background. Here are some ways to keep distractions away:
| Strategy | Description |
|---|---|
| Mute | Stay quiet when not speaking to block out background noise. |
| Outside noise | Ask people to avoid mowing lawns or doing construction during your shoot. |
| Dress | Wear simple clothes that do not stand out or distract viewers. |
| Gestures | Keep hand movements small and only use them when needed. |
| Background | Pick a plain or simple background to keep the focus on you. |
You should always plan for the unexpected. Sometimes, a dog barks or a car honks. If you prepare for these things, you can keep your interview looking and sounding professional. This helps you create an appropriate interview environment and makes shooting an interview much easier.
Note: A simple setup with just a camera, a microphone, and a tripod can look very professional if you plan well. You do not need expensive gear to get great results when shooting an interview outdoors.
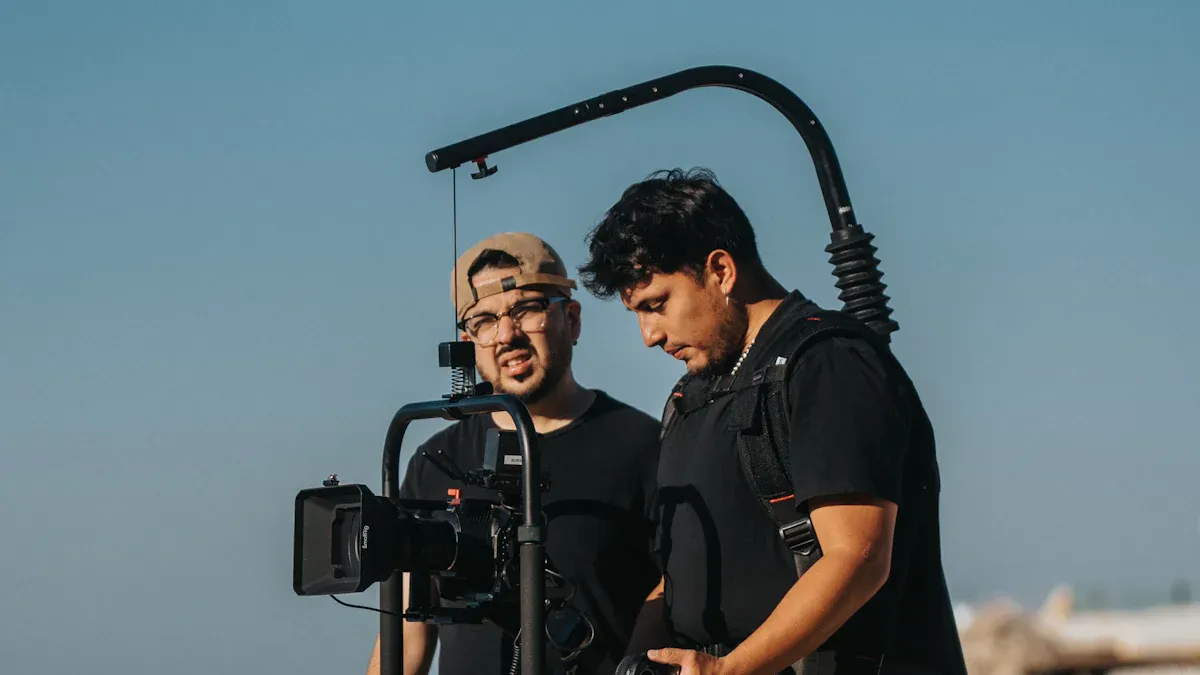
Equipment
Cameras
You need a camera that works well outside. Some cameras are better for interviews. The table below lists top choices and features:
| Camera Model | Price | Key Features | Scenarios |
|---|---|---|---|
| full-frame hybrid camera | mid-to-high budget | 4K video, fast focus, stabilization, subject tracking | Expert interviews, moving subjects |
| low-light full-frame hybrid camera | used or discounted full-frame budget | Stabilization, high ISO, long battery, pro video | Professional interviews, outdoor interviews |
| event-style camcorder | camcorder budget | 20x zoom, good in low light, light weight, audio control | Event interviews, outdoor interviews |
Pick a camera that matches your needs and budget. Always test your camera before you start filming. This helps you avoid problems.
Microphones
Clear sound makes your interview better. Wired lapel microphones are cheap and work well. They give you steady sound. Wireless lapel microphones let you move easily. They stop wires from getting tangled. Both types work well. Check which one fits your location best.
Tripods & Stabilizers
Outdoor ground is often uneven. Here are ways to keep your camera steady:
-
Hang weight bags on your tripod for more stability.
-
Use leveling bases to keep your tripod straight.
-
Adjust each tripod leg to fit the ground.
-
Use rocks or logs for extra support.
A steady camera gives you smooth video every time.
Reflectors & Diffusers
Light changes quickly outside. Reflectors bounce light to fill shadows. They help make faces look better. Diffusers soften strong sunlight. You can use a white reflector to brighten dark spots. A gold reflector adds warmth.
Wind Protection
Wind can mess up your sound. Brands like Rode, Movo, Shure, and Deity Microphones make furry windscreens. These block wind noise. They help you record clear sound even when it is windy.
Backup Gear
Making extra recordings protects you from losing content. Use an external audio recorder like the Zoom PodTrak P4 or RODECaster Pro. These record clean sound if your main device fails. Always bring extra batteries and memory cards.
Test all your gear before the interview. This helps you find problems early and keeps your shoot smooth.
Lighting
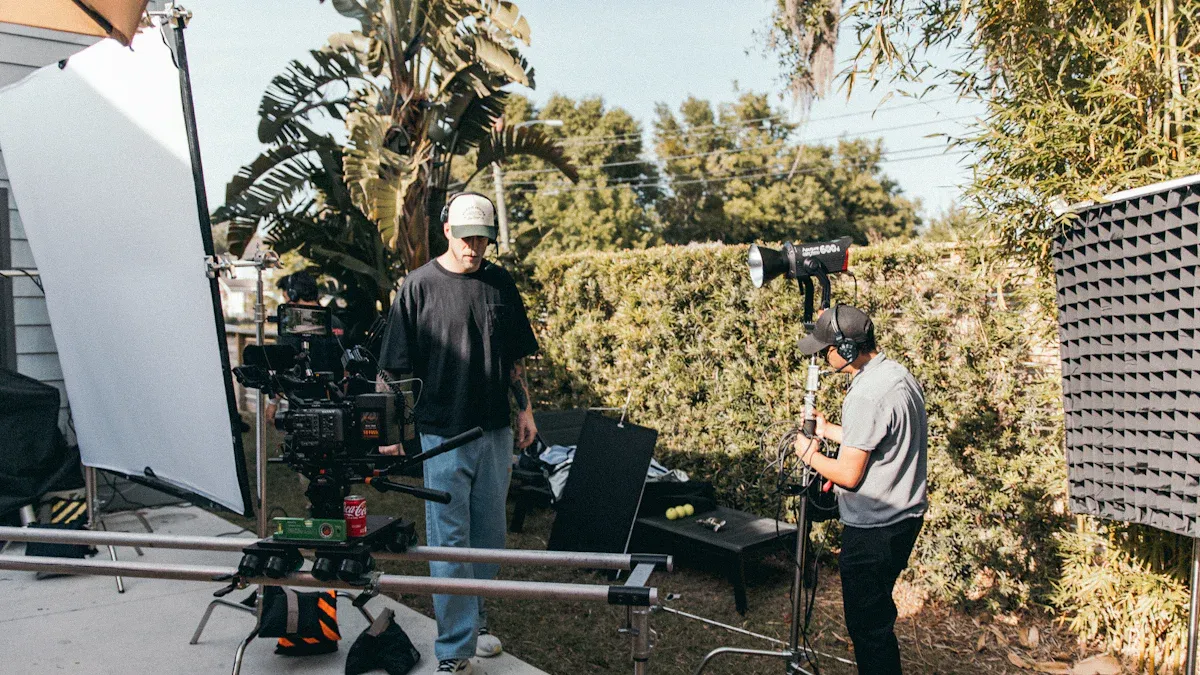
Natural Light
Natural lighting gives your video a fresh and real look. You do not need expensive lights when you use sunlight. You can use the sun as your main light source. Try to find shade if the sun is too strong. Shade helps you avoid overexposure and keeps your video soft. Cloudy days also help because clouds spread the sunlight and make it gentle. You should always watch how the light changes during the day. This helps you keep your interview looking good.
Tip: Use natural lighting to save time and money. Always check the weather before your shoot.
Sun Position
The position of the sun changes how your video looks. If you shoot when the sun is high, you get harsh shadows and bright spots. Shooting in the shade works better than direct sunlight. You can also shoot during the “magic hour,” which is early morning or late afternoon. The sun is low, and the light is soft. This makes faces look better and helps people keep their eyes open.
-
Face your subject away from the sun to stop squinting.
-
Place your subject with their back to the sun for natural backlighting.
-
Look for shade to avoid strong sunlight.
-
Try to shoot on cloudy days for even light.
Diffusion Materials
Diffusion materials help you soften strong sunlight. You can use a white sheet, a translucent umbrella, or a professional diffuser. These tools spread the light and make it less harsh. Place the diffuser between the sun and your subject. This stops sharp shadows and keeps faces looking smooth.
| Diffusion Material | Effect on Lighting | Easy to Use? |
|---|---|---|
| White Sheet | Softens sunlight | Yes |
| Translucent Umbrella | Spreads light evenly | Yes |
| Professional Diffuser | Gives best results | Yes |
Bounce Boards
Bounce boards help you control natural lighting. They reflect sunlight onto your subject and fill in dark spots. You can use a white board for soft light or a silver reflector for strong light. Adjust the angle and distance to change how much light you bounce. Bounce boards help you reduce harsh shadows and make your video look professional.
-
Use the sun as your main light.
-
Add a bounce board to create a second light source.
-
Pick the right material for the mood you want.
-
Move the board to control the light.
Avoiding Harsh Shadows
Harsh shadows can make your video look messy. You can avoid them by using natural lighting in smart ways. Position your subject so the light falls evenly on their face. Use reflectors to bounce light into dark areas. Place a diffuser between the sun and your subject to soften strong sunlight.
Note: Always check your camera screen for shadows before you start recording.
Optimal Times
The best times for outdoor video interviews are in the morning or late afternoon. These times are called the golden hour. The light is soft and warm. You get fewer shadows and better skin tones. Try to plan your shoot during these hours for the best results.
-
Morning light is gentle and flattering.
-
Late afternoon light gives a warm glow.
-
Avoid shooting at noon when the sun is high.
Lighting for Outside Video Interviews
Lighting can change quickly outside. You need to watch for clouds, moving shadows, and changes in sunlight. Use natural lighting as much as possible. Add diffusion materials and bounce boards to control the light. Always test your setup before you start. This helps you fix problems early and keeps your video looking professional.
Tip: Practice with different lighting setups before your interview. This helps you learn what works best for your location.
Audio
Clear audio makes your outdoor video interview stand out. You want your viewers to hear every word without distractions. Wind and background noise can ruin your recording. You must always optimize for sound when you plan your setup.
Microphone Selection
Choosing the right microphone helps you capture clean audio. Each type has its own strengths:
-
Shotgun microphones pick up sound from one direction. They work well for focusing on your subject but can catch wind noise.
-
Lavalier microphones clip onto clothing. They give you freedom to move and record close-up voices. Watch out for rustling sounds from clothes.
-
Handheld microphones are easy to use and good for moving interviews. They can pick up handling noise.
-
Stereo microphones record the whole environment. They work best for capturing background sounds but can be bulky.
Tip: Use windscreens and shock mounts to optimize for sound and reduce unwanted noise.
Wind & Noise Reduction
Outdoor interviews often face wind and ambient noise. You can take steps to reduce these problems:
-
Use lavalier microphones with windshields to block wind.
-
Pick spots with natural barriers, like trees or walls.
-
Try directional microphones to focus on your subject and cut out background sounds.
-
Always listen to your surroundings before you start recording.
Windshields
Windshields protect your microphone from wind and help you get clear audio. Many creators use wind mufflers for outdoor interviews. The VideoMic Pro+ has a special suspension system and a wind muff for extra protection. Wind mufflers work well for blocking background noise and keeping your audio crisp.
Note: Wind mufflers are a must-have for outdoor interviews. They help you keep your sound clean even on breezy days.
Monitoring Audio
You need to check your audio as you record. Use headphones to listen in real time. Ask a second person to help catch any background noise you might miss. An audio mixer lets you control sound levels for each microphone. Always monitor your audio so you can fix problems right away.
Tip: Never skip the audio check. Good monitoring helps you deliver professional results every time.
Composition
Subject Positioning
You can make your interviewee look their best by thinking about where you place them.
-
Use shaded areas to get even lighting and avoid harsh shadows on the face.
-
If you must shoot in bright sunlight, try backlighting your subject and use a reflector or fill light to balance the exposure.
-
Place your subject so they face slightly toward the long side of the frame. This creates a balanced and pleasing look.
-
Keep the main light source on the long side of the face to reduce harsh shadows and highlight features.
Tip: Always check how the light falls on your subject before you start recording.
Camera Angles
Different camera angles help tell your story and keep viewers interested.
-
Use close-up shots to show facial expressions and connect with your audience.
-
Try high-angle shots to show vulnerability or low-angle shots to show strength.
-
Over-the-shoulder shots add depth and show the environment around your subject.
-
Mixing angles makes your video feel more dynamic and engaging.
Multiple Angles
Using more than one camera angle adds excitement and depth to your interview.
-
Capture your subject from different sides for visual interest.
-
A second camera can act as a backup and help you catch special moments.
-
Switching between angles keeps the video lively and helps highlight key points.
-
Multiple angles also make editing easier and help you avoid jump cuts.
Note: You do not need expensive gear to use multiple angles. Even a smartphone can serve as a second camera.
Eye Level
Set your camera at the same height as your subject’s eyes. This creates a natural and flattering view. Eye-level shots help your audience feel connected to the person speaking. Avoid shooting from too high or too low, as this can make your subject look awkward.
Background Selection
Choose a background that supports your story and keeps the focus on your interviewee.
-
Avoid busy or cluttered backgrounds that can distract viewers.
-
Pick a background that matches the topic of your interview.
-
Good lighting helps separate your subject from the background and makes them stand out.
Remember: A simple, well-lit background always works best for outdoor interviews.
Interviewee Prep
Wardrobe Tips
Choosing the right outfit helps you look professional and feel confident during outdoor interviews. You want your clothes to work well with the camera and the setting. Here are some tips to help you pick the best wardrobe:
-
Wear comfortable and well-fitted clothing. This helps you move easily and look relaxed.
-
Avoid bright colors and busy patterns. These can distract viewers and may not look good on camera.
-
Pick colors that stand out against the background. You do not want to blend in with trees, grass, or walls.
-
Make sure your outfit matches the brand image or the tone of the interview.
-
Choose clothes that make you feel confident and calm.
Tip: Try on your outfit before the day of the shoot. Check how it looks in natural light and on camera.
Comfort Outdoors
You need to feel comfortable when shooting an interview outside. The weather, location, and your outfit all play a part. Here are ways to stay at ease:
-
Set up a comfortable environment for yourself. Bring a chair or cushion if you need one.
-
Dress for the weather. Wear layers if it is cold or bring a hat for shade if it is sunny.
-
Avoid distracting clothing and accessories. Simple outfits keep the focus on your words.
-
Choose neutral tones and soft textures. These look good on camera and help you feel relaxed.
-
Bring a spare set of clothes in case of spills or sudden weather changes.
A relaxed interviewee gives better answers. Start with easy questions to help you settle in. Listen to positive feedback from the crew. Take breaks if you feel tired or overwhelmed.
Environmental Prep
Outdoor settings can change quickly. You need to prepare for anything. Here are some steps to help you get ready:
-
Check the weather forecast before the shoot. Bring sunscreen, water, or an umbrella if needed.
-
Know where you will sit or stand. Practice your posture and where to look.
-
Ask for clear instructions from the crew. This helps you feel more confident.
-
Make sure you have everything you need, like water, tissues, or a notepad.
Note: Good preparation helps you stay calm and focused. You can handle surprises better when you plan ahead.
Taking these steps ensures you look and feel your best when shooting an interview outdoors.
Troubleshooting
Outdoor video interviews can bring surprises. You need to stay ready for anything. Here are some common problems and ways to solve them.
Weather Changes
Weather can shift quickly. Rain, wind, or sudden clouds may appear during your shoot. Always check the forecast before you go out. Pack extra gear like umbrellas, rain covers, or tarps. If the sun disappears, use a reflector or a white sheet to keep your subject well-lit. When it gets windy, secure your equipment and use windshields on microphones. You can pause the interview and wait for better conditions if needed.
Tip: Bring extra clothes and towels. You can stay dry and comfortable if the weather changes.
Unexpected Noise
Noise from cars, people, or animals can interrupt your interview. Choose a quiet location before you start. Ask people nearby to keep noise down. Use lavalier microphones with windshields to block out background sounds. Always monitor your audio with headphones. If loud noises happen, stop and restart the question. This helps you get a clean recording.
Common Noise Solutions:
-
Move away from busy roads or playgrounds.
-
Use natural barriers like bushes or walls.
-
Record a few seconds of background sound for easier editing later.
Lighting Shifts
Natural light changes fast outdoors. Clouds can cover the sun or move away, making your video look different. Use reflectors or diffusers to control the light. Place your subject in the shade if the sun gets too bright. Watch your camera screen for harsh shadows or overexposed spots. Adjust your setup as needed to keep the lighting even.
Note: Control ambient light with reflectors or curtains if you shoot near buildings.
Equipment Issues
Equipment can fail at any time. Batteries may die, memory cards can fill up, or cables might break. Always bring backup gear. Test everything before shooting an interview. Keep extra batteries, memory cards, and cables in your bag. If your camera stops working, use a smartphone as a backup. Check your tripod for stability on uneven ground.
Quick Fixes Table:
| Problem | Quick Fix |
|---|---|
| Dead battery | Swap in a charged spare |
| Full memory card | Replace with an empty card |
| Broken cable | Use a backup cable |
| Unsteady tripod | Adjust legs or add weight |
Stay calm and solve problems one at a time. Good preparation helps you handle surprises and keep your interview on track.
You can make your videos look great if you follow these steps. Plan where you will film and check your equipment before starting. Be ready to change things if the weather or light changes outside. Practice a lot so you get better at outdoor video interviews. Each time you film, you can learn something new. Keep asking questions and try to do better every time. 🌟
FAQ
What is the best time of day to film an outdoor interview?
You get the best light during early morning or late afternoon. This time is called the golden hour. The sun is low, and the light looks soft and warm on camera.
How do you stop wind noise in your audio?
You should use a windscreen or a furry cover on your microphone. These tools block most wind noise. Always test your audio before you start recording.
What should you do if it starts raining during your shoot?
You need to protect your gear right away. Use rain covers or umbrellas. Move to a sheltered area if possible. Pause the interview until the rain stops.
Can you use a smartphone for outdoor video interviews?
Yes, you can use a smartphone. Make sure you use a tripod for steady shots. Add an external microphone for better sound. Clean your lens before filming.
Outdoor Interview Field Checklist
Outdoor interviews are controlled chaos with nicer scenery. Your camera, light, audio, and background all need a backup plan because the sun moves, wind exists, and people insist on using leaf blowers during important sentences. Start with audio from the wireless microphone buying guide, then plan shade, negative fill, and a clean background before worrying about fancy camera moves.
- Scout the sound first: traffic, HVAC, fountains, construction, wind, and crowds matter more than the prettiest background.
- Face direction: avoid harsh front sun and raccoon-eye overhead light; open shade is your friend.
- Control contrast: use diffusion, reflectors, or negative fill when the face and background fight each other.
- Bring wind protection: lav fur, shotgun wind protection, and backup recording save outdoor shoots.
- Plan the edit: grab b-roll and room-tone style ambience before the location changes.
For the shot design side, pair this with the camera angles guide and frame rate guide. A beautiful outdoor interview still needs the right angle, a usable shutter/frame-rate choice, and sound that does not make the viewer reach for the back button.


