Skip to content

Imagine this: You own a business and need cool content. Making videos is now super important for businesses. About 89% of companies use videos to market. That’s because 95% of marketers say videos are key to success. Also, 87% of people buy things after watching a video. Learning Video Editing yourself can save money. It also lets you be creative and share your brand’s story. This guide will teach you the skills for professional Editing, helping you create great business videos that grab people’s attention.
Key Takeaways
-
Videos are important for marketing. They catch attention and help sell things. Use videos to connect with people and increase sales.
-
Learning to edit videos yourself saves money and gives control. You can make videos that fit your brand without waiting for help.
-
Planning is very important. Make a list of shots to organize ideas. This helps you get all the clips you need for your video.
-
Use easy editing tricks like cutting clips and adding transitions. This makes your story clear and keeps people watching.
-
Add captions and text to make your videos easy to understand. This helps more people get your message and grow your audience.
Why Video Editing Matters for Your Business
Why video is key in today’s marketing
Videos are a big part of modern marketing plans. They grab attention fast and share ideas clearly. Studies show 82% of people like watching product videos more than reading about them. This shows how videos can keep people interested. You can use videos to show your products, explain how they work, or share happy customer stories. These things help people trust you and feel connected to your brand.
Video marketing also brings clear results. By 2025, 89% of businesses will use videos to market. Marketers say 96% of video campaigns help people know their brand better. Also, 82% of these campaigns bring more visitors to websites. Videos help get new customers and increase sales. In fact, 84% of marketers say videos directly boost sales. Adding videos to your plan helps you connect with people and stand out from others.
Why entrepreneurs should learn video editing
Learning to edit videos yourself has many perks. First, it saves money. Hiring editors can cost a lot, especially for small businesses. Doing it yourself means you can spend money on other important things. Second, you stay in control. You can make videos that match your brand’s style and message. This keeps all your marketing materials consistent.
Editing your own videos also means faster results. You don’t have to wait for others to finish the work. This speed is important in today’s fast-moving online world. With the right tools and skills, you can make great videos that your audience will love.
How good videos build trust in your brand
High-quality videos make your brand look professional. They show you care about doing things well. Telling stories through videos helps people feel closer to your brand. For example, showing how your products work proves their quality and usefulness.
Good videos also make your brand seem like an expert in your field. Tutorials and how-to videos show you know your stuff. Plus, videos are easy to share, which spreads your message further. When people share your videos, they’re recommending your brand, which boosts your reputation even more.
Preparing for Video Editing Success
Planning your video with a shot list or outline
Good planning makes video editing easier. Start by making a shot list or outline. This helps you organize ideas and remember what to film. A shot list is like a map. It shows each scene and shot so you don’t forget anything. Write down details like scene numbers, shot descriptions, and camera moves. Being organized saves time and keeps you focused.
Here’s an example of what a shot list might look like:
| Element | Description |
|---|---|
| Scene and shot number | Shows the scene and shot for quick reference. |
| Shot description | Explains what happens in the shot. |
| Shot size | Tells the type of shot (like wide or close-up). |
| Camera movements | Notes how the camera will move. |
| Relevant gear or tech | Lists tools needed for the shot. |
| Talent | Names the people needed for the scene. |
| Where and when | Says where and when to film. |
| Sound | Explains how sound will be recorded. |
| Extra notes | Adds any other important details. |
Using a shot list helps you picture your video before filming. This makes the process smoother.
Capturing sufficient footage and recording multiple takes
Always film more than you think you’ll need. Record each scene a few times. This gives you choices when editing. If one take has bad lighting or sound, you’ll have backups. Extra footage is like a safety net. It lets you try different angles and edits later. This way, your video will look polished and complete.
Having more footage also helps you stay flexible. You can fix mistakes or add creative touches. Whether you’re showing a product or telling a story, extra clips make editing easier and better.
Organizing and labeling your files for efficiency
Keeping your files organized makes editing less stressful. Start by creating folders for each part of your project. For example, have folders for raw clips, audio, and final videos. Name your files clearly, like “Scene1_ShotA_Take1.mp4,” so they’re easy to find.
Follow these steps to stay organized:
-
Consistent Naming Conventions: Name files in a clear and simple way.
-
Create a Folder Hierarchy: Make folders for each stage, like “Raw Clips” or “Final Videos.”
-
Use Metadata and Tags: Add tags to files to find them faster.
-
Use Cloud Storage and Backup: Save files online to keep them safe and accessible.
-
Implement a Color-Coding System: Use colors to quickly spot different file types.
Being organized saves time and avoids confusion. It also helps you focus on making great business videos.
Setting up your project with the right settings (e.g., resolution, frame rate)
Before editing, choose the correct settings for your project. This helps your video look good and play smoothly everywhere. Proper settings make sure your audience enjoys your content.
Picking the Best Resolution and Frame Rate
Resolution and frame rate are key for video quality. Resolution is how many pixels are in your video. Frame rate is how many pictures show each second. Use this guide to pick the right ones:
| Setting | Recommendation |
|---|---|
| Resolution for web/streaming | 1080p |
| Resolution for high-quality | 4K |
| Frame rate for web/streaming | 30 fps |
| Frame rate for slow motion | 60 fps |
For most business videos, 1080p and 30 fps work great. For fancy promos or slow-motion shots, try 4K and 60 fps for a sharper look.
File Format and Codec
The file type and codec affect video size and quality. Use the H.264 codec and save as an .mp4 file. This keeps your video clear and small enough to share online.
| Setting | Specification |
|---|---|
| Codec | H.264 |
| File format | .mp4 |
Bitrate and Image Resolution
Bitrate decides how much data your video uses. Higher bitrates mean better quality but bigger files. For regular videos, use 5-20 Mbps. For top-quality videos, go for 20-50 Mbps. Set image resolution to 3840 x 2160 UHD for super-clear visuals.
Why These Settings Are Important
Good settings make your videos look sharp and professional. They also stop problems like lagging or blurry images. This helps your brand look trustworthy. Setting things up right saves time and makes editing easier.
Pro Tip: Always check your settings before exporting. This ensures your video meets platform rules and keeps its quality.
Next, we’ll explore editing tricks to create a smooth and exciting story.
Mastering Essential Video Editing Techniques
Cutting and organizing your clips is key to making a great story. First, find the most important parts of your video. Remove extra or boring sections to keep it interesting. Put your clips in an order that makes sense, like writing a short story. Start with an introduction, explain the main idea, and end with a strong conclusion.
Did you know? The human brain can process visuals in just 13 milliseconds. This makes videos a great way to create lasting memories.
To keep viewers watching, make sure clips flow smoothly. Match the sound with the video for a better experience. Sync voices and sound effects with the action on screen. A well-planned sequence of scenes keeps your audience interested from start to finish.
Using transitions like fade-ins, fade-outs, and crossfades
Transitions help connect your video clips. Simple ones like fade-ins and fade-outs can improve your video. A fade-in from black shows a new scene is starting. A fade-out to black signals the end of a scene. For example, fading out as someone falls asleep and fading back in to a new day makes the story flow better.
Crossfades, or cross-dissolves, are another useful tool. They mix two clips together and are great for showing time passing or changing perspectives. These transitions make your video look smooth and professional.
Improving storytelling with pacing and match cuts
Pacing is important when editing videos. Changing how fast or slow clips are can create different feelings. Quick cuts add excitement, while slower cuts feel calm and thoughtful. For example, tutorials often use slow pacing so viewers can follow along easily.
Match cuts are another cool editing trick. They connect two shots with similar shapes, movements, or themes. This makes the video look smooth and adds meaning. A famous example is in 2001: A Space Odyssey, where a bone thrown in the air changes to a spaceship, showing progress in technology.
By learning pacing and match cuts, you can turn your clips into exciting videos that connect with your audience.
Adding captions and text overlays to make videos easier to understand
Captions and text overlays help more people enjoy your videos. Captions let viewers follow along even if they can’t hear the sound. This is great for people with hearing problems or those in loud places. Text overlays show important ideas, making your message clear and easy to remember.
Making videos accessible helps both your audience and your business. Since 2021, captions have been used 572% more often. One gaming channel gained 15% more subscribers by adding captions. This shows how accessibility can grow your audience. Captions also help non-native speakers and people who like reading while watching.
You can add captions using tools like Adobe Premiere Pro or CapCut. These programs make it simple to match captions with your video. For text overlays, use short and strong phrases. Highlight product details, action steps, or key points. Pick a readable font size and match the text style to your brand.
Pro Tip: Use your brand’s colors for text overlays. This keeps your videos looking professional and consistent.
Adding captions and text overlays isn’t just a fancy skill—it’s a must-have for great business videos. These tools make your videos easier to understand, more engaging, and better at sharing your message.
Advanced Tools and Software for Business Video Editing
Easy-to-use tools: iMovie, Canva, and CapCut
If you’re new to editing, try simple tools like iMovie, Canva, or CapCut. These tools are made to be easy, so beginners can start quickly.
-
CapCut: Add cool filters, effects, and transitions to your videos. It’s great for improving your content without being hard to use.
-
Canva: Canva isn’t just for design—it’s also great for videos. With over 50,000 templates, it’s perfect for making eye-catching posts and graphics.
-
iMovie: For Apple users, iMovie is simple and user-friendly. Drag-and-drop features and built-in themes make editing smooth and fun.
People love these tools because they’re easy and work on phones or computers. Whether you’re at home or traveling, they make editing simple.
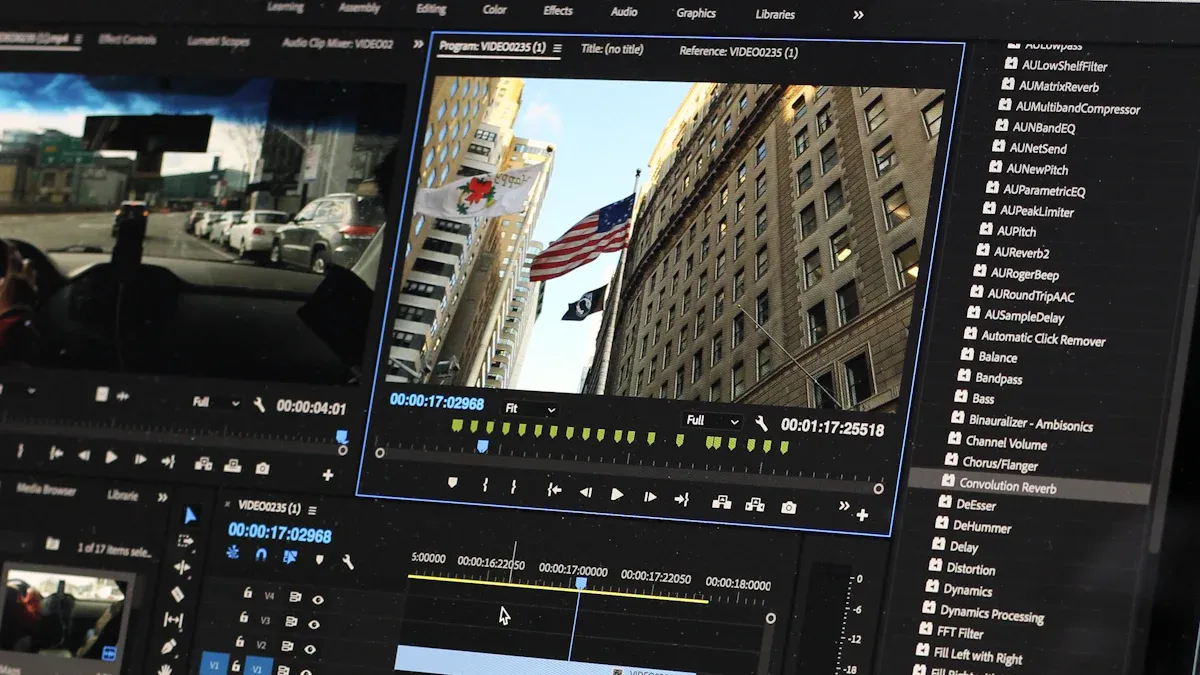
Advanced software: Adobe Premiere Pro, Final Cut Pro, and DaVinci Resolve
For bigger projects, advanced tools like Adobe Premiere Pro, Final Cut Pro, and DaVinci Resolve are the best. Professionals trust these tools for their power and flexibility.
| Software | Skill Level Needed |
|---|---|
| Advanced | |
| Advanced | |
| DaVinci Resolve | Advanced |
-
Adobe Premiere Pro: Works with many file types and saves time. It uses GPU acceleration for faster editing and exports high-quality videos.
-
Final Cut Pro: Made for Macs, it handles 1080p to 8K videos. Features like magnetic timelines make big projects easier.
-
DaVinci Resolve: Famous for color grading, it also edits sound well. It supports 4K and 8K videos with fast processing.
These tools take time to learn but give you control to make amazing videos.
AI tools for faster editing
AI tools make editing quicker by doing boring tasks for you. They let you focus on being creative while handling the technical stuff.
-
AI fixes colors and adds effects automatically, saving time and money.
-
Tools like Runway and Descript make editing simple, even for beginners.
-
Small businesses can now handle big projects thanks to AI’s help.
Using AI tools means you can create videos faster and cheaper. This is a big win for small businesses.
Benefits of cloud-based editing platforms for teamwork
Cloud-based editing tools have changed how teams work on videos. These platforms make teamwork easy, fast, and available anywhere.
A big benefit is real-time editing. Many people can edit the same video at once. This stops problems with different versions and messy feedback. For example, a team can assign tasks, check progress, and give quick feedback in one place. This avoids confusion and keeps projects on track.
These tools also improve clarity. By keeping all files and updates in one spot, everyone can see progress and tasks clearly. This helps people stay responsible and know their roles. Brainstorming is easier too, with tools for quick feedback and idea changes.
With remote work now common, cloud platforms fit perfectly. Team members can join from anywhere, making it simple to work across time zones. Companies using tools like Microsoft Teams and Slack saw 25% more engagement, showing how these tools boost productivity.
Another plus is global access to project files. Whether making ads or tutorials, cloud platforms let teams work together worldwide. This is great for businesses with teams or clients in different places.
Using cloud-based editing tools makes work smoother, improves communication, and helps create high-quality videos faster. These platforms are a must-have for modern video editing.
Pro Tips for Polished and Engaging Videos
Adding brand colors, logos, and text overlays
Using your brand colors, logos, and text in videos helps people remember your business. Adding your logo in a corner keeps your brand visible. Text overlays can show important points or actions to take. This helps viewers understand your message, even without sound.
Bright overlays also make videos more interesting. Research shows branded videos keep viewers watching longer. Match your text and graphics with your brand’s style. Tools like Canva or Adobe Premiere Pro help create overlays that look professional and fit your brand.
Pro Tip: Use your main and secondary brand colors for text and graphics. This keeps your videos looking consistent and professional.
Improving audio with noise removal and volume balance
Good sound makes your video better. Bad audio can distract viewers, even if the visuals are great. Remove background noise like hums or static using tools like Audacity or Adobe Audition. Clean audio makes your video sound professional.
Balancing the volume, called normalization, is also important. It keeps the sound even, so nothing is too loud or too quiet. This is especially helpful for teaching or ads. People often judge videos by their sound, so fixing audio is worth the effort.
Pro Tip: Test your audio on different devices to make sure it sounds good everywhere.
Enhancing visuals with color grading
Color grading changes how your video looks and feels. Adjusting colors, brightness, and contrast can create emotions or set a mood. For example, warm colors feel friendly, while cool colors look professional.
Color grading also makes your video look consistent and high-quality. Tools like DaVinci Resolve and Adobe Premiere Pro help you adjust colors easily. Studies show that good color grading keeps viewers interested and helps them remember your brand.
Pro Tip: Match your video’s colors with your brand’s message. A consistent style leaves a strong impression on viewers.
Exporting videos in the right format for different platforms
Picking the right format makes your video look great everywhere. Each platform has its own rules, so adjust your settings to keep quality high.
Common Formats for Different Uses
Different formats work for different needs. Here’s a simple guide:
-
Online videos: Use MP4 or WEBM for easy sharing online.
-
Home videos: MP4 or AVI give good quality and last long.
-
Windows applications: WMV works best on Windows computers.
Platform-Specific Recommendations
Social media platforms need specific formats for smooth playback. Exporting correctly helps your video look better and keeps viewers interested.
-
YouTube: Use MP4 with AAC-LC for sound and H.264 for video. This gives clear audio and sharp visuals.
-
Instagram: MP4 is best because it’s small and keeps quality.
-
Facebook: MP4 or MOV work well, but MP4 is the easiest to upload.
Steps to Export Your Video
Follow these steps to export your video properly:
-
Pick the right file type: MP4 works for most platforms.
-
Set the resolution: Use 1080p for normal videos or 4K for sharper ones.
-
Adjust the bitrate: Use 5-20 Mbps for regular videos and 20-50 Mbps for high-quality ones.
-
Check audio settings: Use AAC-LC for clear sound and music.
Pro Tip: Watch your video before exporting to fix any problems with sound or visuals.
Exporting the right way makes your video look professional and work well on all platforms. This step is key to creating videos that impress your audience.
When to Hire a Professional Editor
Knowing when expert help is needed
Some videos need special skills to look amazing. For example, making a commercial, a fancy promo video, or a top-notch business presentation often requires a pro. These projects need advanced editing, color adjustments, and sound fixes that basic tools can’t handle.
Big projects need careful work, problem-solving, and technical know-how. These skills make sure your video looks polished and grabs attention. With videos making up 82% of internet traffic by 2022, the need for skilled editors has grown. A pro can help your content shine in a crowded market.
Deciding based on time, money, and quality
Think about your resources before hiring a pro. If you’re short on time, outsourcing can help you meet deadlines without stress. Experts work fast and deliver on time.
To manage costs, keep these tips in mind:
| Evidence | Description |
|---|---|
| Clear goals and deadlines | Setting clear goals avoids long editing times and extra costs. |
| Smart spending | Focus on things like good cameras or sound gear for better results. |
| Pre-planning | Planning ahead prevents mistakes and saves money during production. |
You can also save by choosing simple locations or using a smaller team. These tricks help you stay on budget while still making a great video.
Working with professional editors
Finding the right editor takes research and good communication. Look at their past work to see if their style fits your needs. Websites like Fiverr, Upwork, or Behance can help you find skilled editors. Once you choose one, set clear roles to avoid confusion.
Tips for working well with editors:
-
Use tools that allow real-time comments and version tracking.
-
Share project files in one place for easy access.
-
Get feedback often to improve the video step by step.
A 2024 report says 91% of businesses use videos for marketing, and 90% see good returns. This shows how important teamwork is for making great videos. By working closely with a pro, you can create videos that boost your brand and attract viewers.
Learning video editing helps you save money and stay creative. You can also tell great stories about your brand. By learning basic skills and trying tools like iMovie or Adobe Premiere Pro, you can make videos that look professional and grab attention. Start with small projects, practice a lot, and improve over time.
To begin, download our Beginner’s Video Editing Toolkit. It has a shot list template, editing tips, and export settings for different platforms. For bigger projects or expert advice, reach out to Nitro Media Group. We can help make your brand stand out with amazing videos.
Resources to Check Out:
FAQ
What are the basics of video editing for beginners?
First, organize your video clips in order. Cut out extra parts and arrange clips to tell a story. Use simple transitions like fades and match the audio with the video. These steps help make your business videos look professional.
How can I make my videos stand out on social media?
Keep your videos short and fun to watch. Add captions, text, and your logo to make them unique. Use bright colors and exciting music to grab attention. Make sure your videos work well on phones since most people watch on mobile.
What’s the best way to learn video editing?
Start with easy tools like iMovie or CapCut. Watch how-to videos and practice with small projects. Try basic skills like cutting clips, adding transitions, and fixing sound. With practice, you’ll get better and feel more confident.
Can I edit business videos without spending a lot?
Yes, you can use free or cheap tools like Canva or CapCut. These tools have templates and are easy to use. If you need advanced features, try software like Adobe Premiere Pro or DaVinci Resolve for professional results.
How do I pick the right video editing software?
Think about your skill level and what you need. Beginners can use simple tools like iMovie. For harder projects, try advanced software like Final Cut Pro. Look for features like templates, color tools, and sound editing to fit your goals.